


Sylxeria
-
Posts
25 -
Joined
-
Last visited
-
Days Won
1
Content Type
Profiles
Blogs
Forums
Gallery
Pipeline Tools
3D Wiki
Plugin List
Store
Downloads
Videos
Posts posted by Sylxeria
-
-
I'm familiar with some of these names (HelloLuxx, Vertex Pusher, fxPHD etc) but a lot of them are new to me - found a wealth of new material to learn from!
I don't know about 'best' but there was https://www.youtube.com/c/eyedesyn / http://eyedesyn.com/tutorials/
Their tutorials + GSG's really helped me understand some of the basics I was 'missing' with Sketch & Toon.
0 -
On 10/31/2021 at 9:00 PM, Matches said:
I can't be sure what's causing the tail displacement without seeing the current scene file, however I would suggest a rig solution that offers convenience and control with minimal effort. The basic idea is to have two rigs for your model: one should be IK-spline and the other FK. The FK rig should be skinned to your model and be driven by the IK rig through a parenting setup. This would allow you the convenience of the IK-spline rig without surrendering control by using an FK rig when you feel the need.
I'm including an example scene to demo what I'm talking about.
There are other solutions to handle a project like this, but I feel that this approach should be a sufficient start without too much hassle.
Sorry for the silence, IRL's been pretty hectic lately! There's a big render ongoing right now but I found out what was causing the distortion in the tail before I started the project rendering - somewhere along the line the weighting on the few joints got royally messed up and now each joint is belonging to four or five other joints haphazardly. Was an easy fix!
Not as easy is figuring out a good solution for the neck and head's 'stiffness' with the IK, the very last controller is unable to really do much with that last portion. I found by changing it off of 'Fit' and onto 'Relative' or something else helps at the cost of the body potentially being able to stretch imcorrectly. Maybe Clamp Constraints on the handles?
I took a look at the IK-FK Demo, had a hard time applying it to another serpentine creature I had and it didn't even have 60 joints, the Constrictor one has 180 !! Didn't seem practical to try setting it up.
One change I've made since we last talked was moving the controls for the head and jaw to the top of the hierarchy and then constraining the respective joints to them. It's not perfect, since sometimes they don't move properly when the spline handles move, but it does prevent the TImeline from becoming unreadable. Whenever those were animated before, it'd stretch the timeline out across the entire screen just so it could show the Head/LowerJaw joints!
0 -
13 hours ago, Matches said:
I can't be sure what's causing the tail displacement without seeing the current scene file, however I would suggest a rig solution that offers convenience and control with minimal effort. The basic idea is to have two rigs for your model: one should be IK-spline and the other FK. The FK rig should be skinned to your model and be driven by the IK rig through a parenting setup. This would allow you the convenience of the IK-spline rig without surrendering control by using an FK rig when you feel the need.
I'm including an example scene to demo what I'm talking about.
There are other solutions to handle a project like this, but I feel that this approach should be a sufficient start without too much hassle.
I didn't know you could have IK and FK work in conjunction with each other like that! Really shows how little my understanding of Cinema4D's rigging is, thanks for the clarification and insight

I don't have the project file on-hand right now but when I get back to my work computer I'll get the file up. I think it might have had something to do with the spline length or the handles, but I can't be sure.
0 -
On 10/27/2021 at 1:32 AM, Matches said:
I've uploaded the file where I've gone ahead and cleaned up the joint rotations on the neck joints, and provided a rough example of the fk setup.
Just an fyi, setting the ik control spline to bezier and adjusting the tangent handles accordingly will give your ik spline controls influence over the rig's P rotation. However this can give you messy results when working with the fk setup, so depending on your animation shot you'll want to set your spline on either bezier or something like b-spline, like you had it originally.
I hope this makes sense.
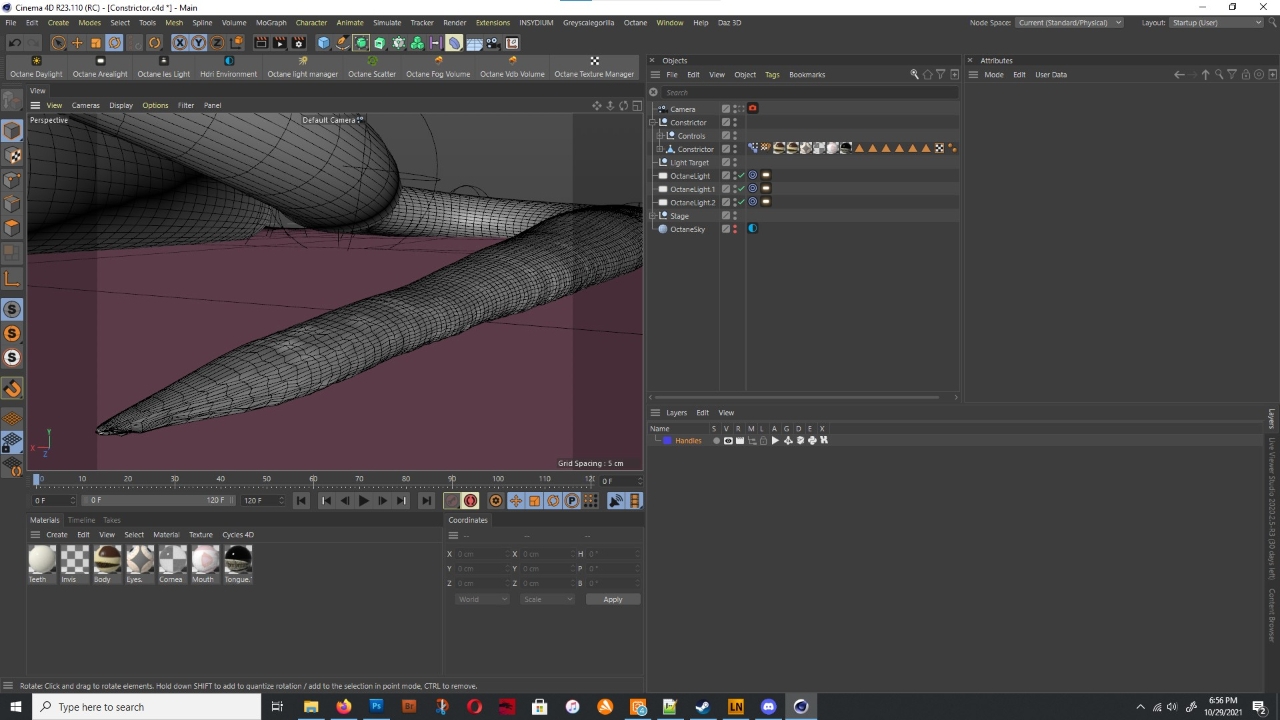
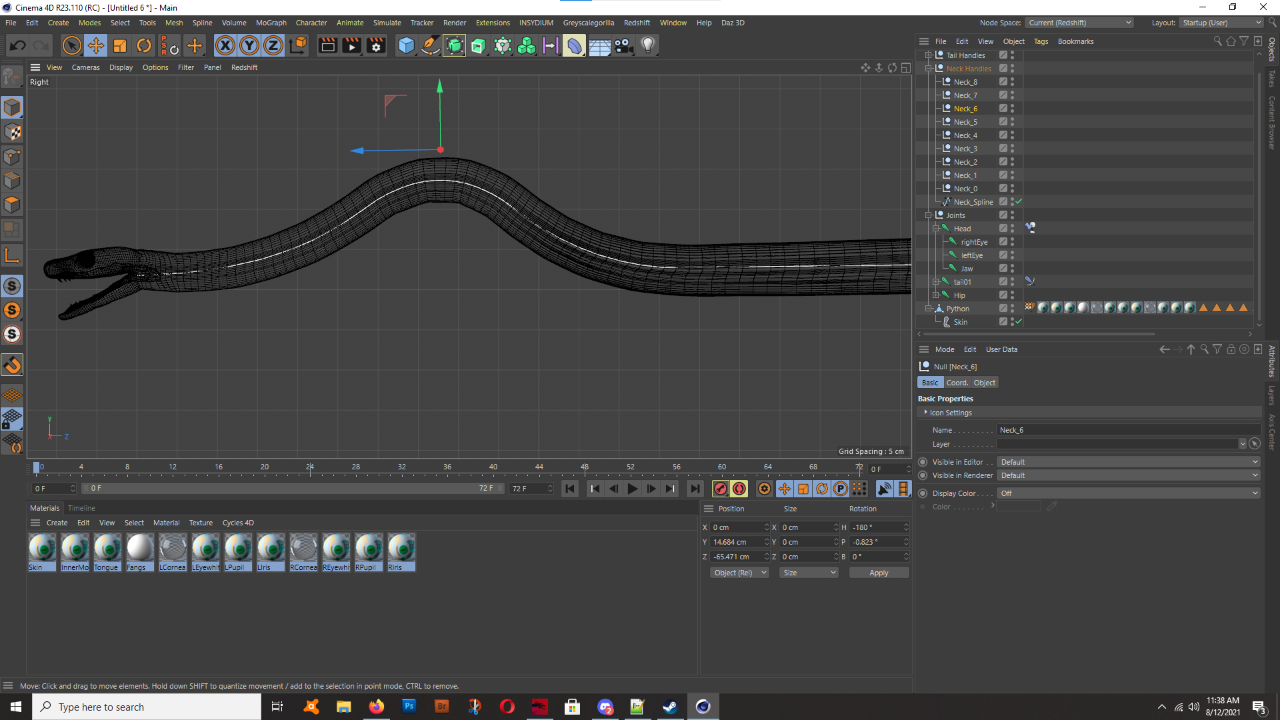
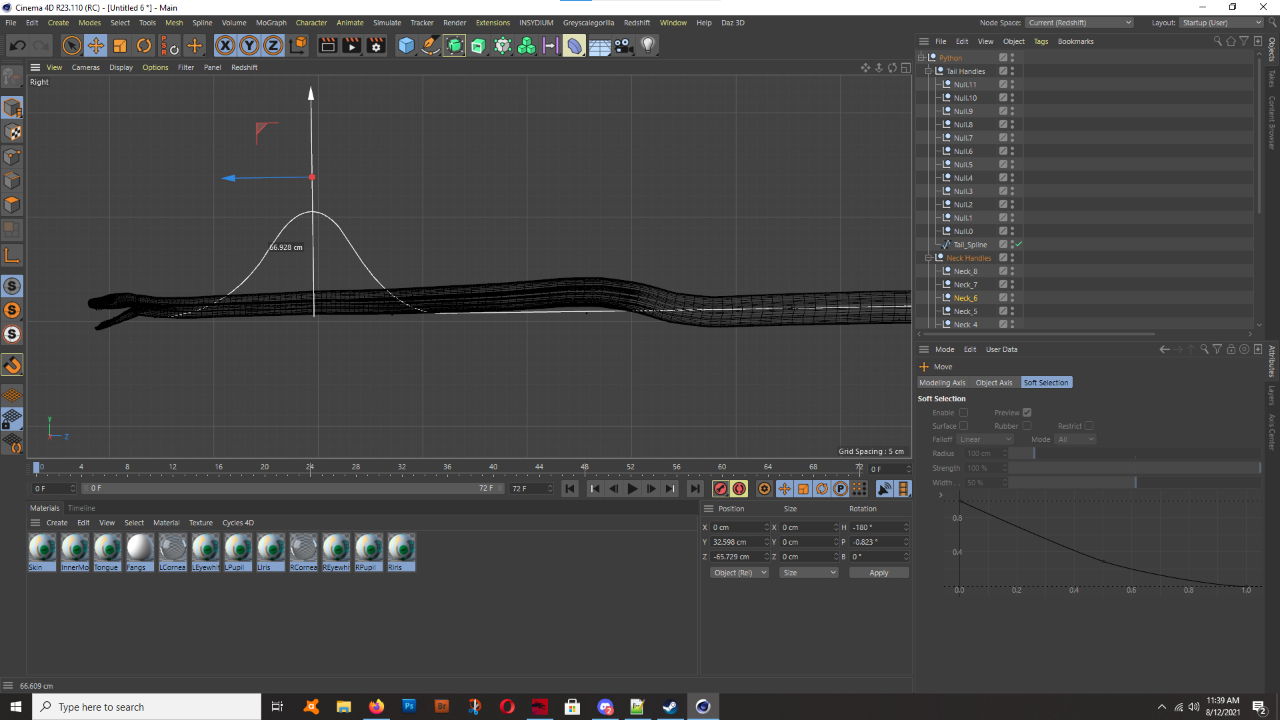
Things have been going pretty well with your advice, though I might need to add in extra handles since it doesn't seem to bend tightly enough with the very few it has on the neck especially. However, my current main concern is the "tip" of the head and tail both can't bend properly and won't rotate like their preceding handles? How would I fix that? Add more points to the spline, or make it longer?
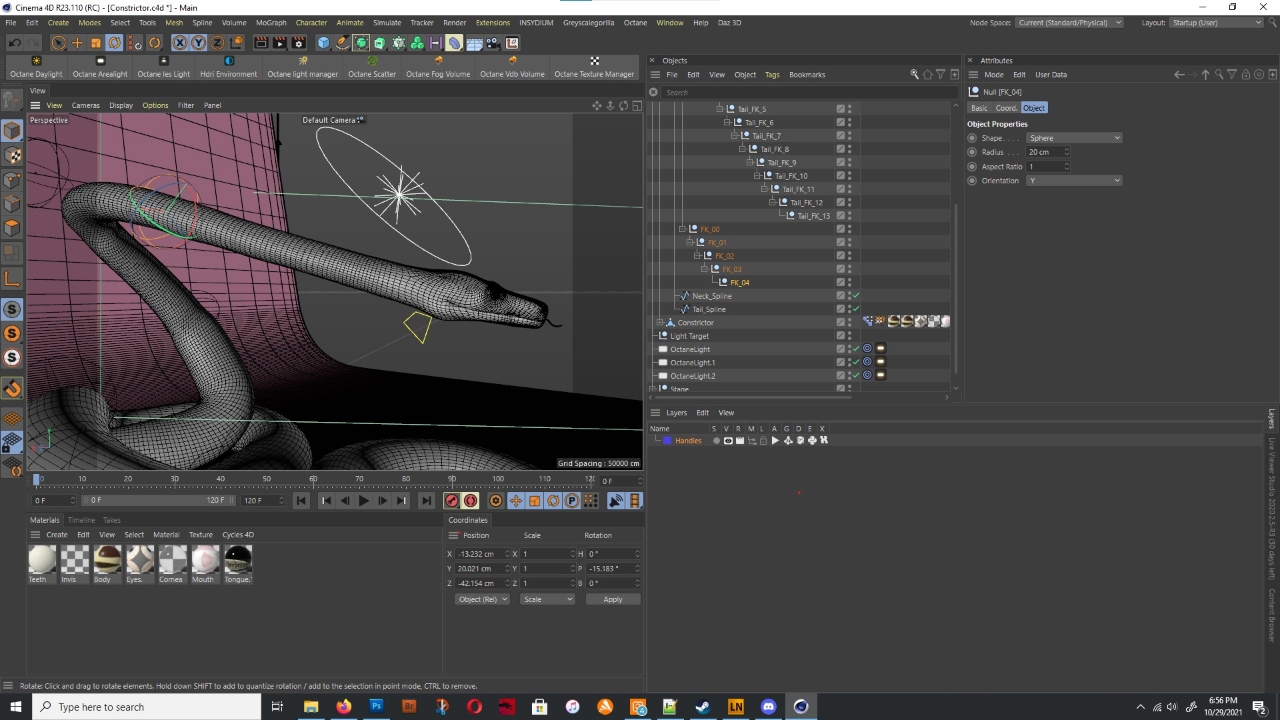
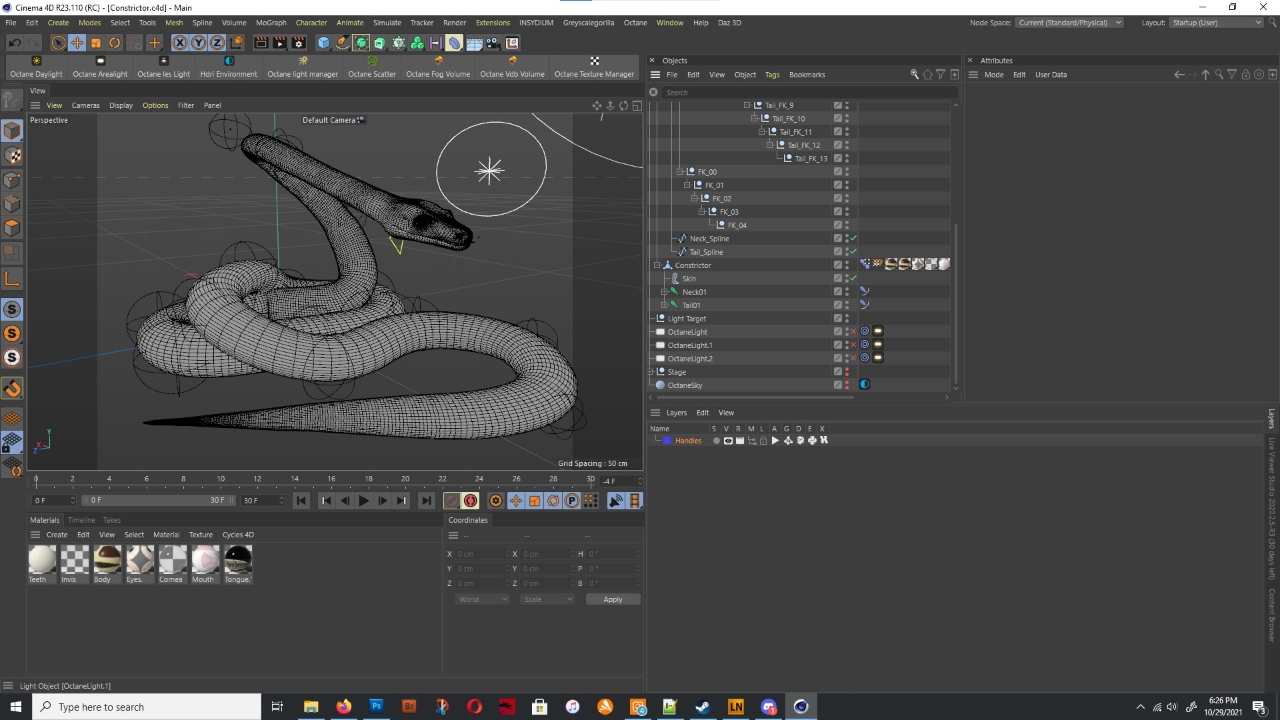
Ignore where the axis currently is though, I had to move it back there to get the curve in the neck behind it - but its the one that can't "bend", only twist a bit. Unless its in Bezier mode, in which case it can bend just fine. It just can't bend in any other mode.
A lesser note is the vertices on the tail tip are all scrunched up. It seems the Spline involved is to blame but I'm not sure how?
 0
0 -
8 hours ago, Matches said:
I've uploaded the file where I've gone ahead and cleaned up the joint rotations on the neck joints, and provided a rough example of the fk setup.
Just an fyi, setting the ik control spline to bezier and adjusting the tangent handles accordingly will give your ik spline controls influence over the rig's P rotation. However this can give you messy results when working with the fk setup, so depending on your animation shot you'll want to set your spline on either bezier or something like b-spline, like you had it originally.
I hope this makes sense.
That's been a lot of help, examining what went wrong and where; though I'm still trying to see where and how I failed to get the joints to align properly - I thought i was doing it right, but I guess not!
There's still the issue of the missing middle joint (The transition between the 'neck' chain and 'tail' chain) as well as if having a Neck/Tail split is ideal for a model like this, but that's a whole different story than the IK Chain topic. Since this was a model I bought I certainly didn't set it up like that and the Boa model I linked earlier is just one long chain starting at the head and ending at the tail, instead of starting at a "Hip" middle point and ending with the Head.
It does make sense yes
Thanks again for all the help, it's definitely helped with my understanding joints and IK
0 -
2 hours ago, Matches said:
Hi, Sylxeria
The way I checked your scene was by zeroing out the rig controls' psr, and then quickly running through the joints via the object manager with the move tool set to local to see each joint's axis. Until joint 23, the chain maintained a relatively consistent up axis, which in this case was the Y axis, but afterwards started to spin around the Z, causing the up axis (Y axis) to tilt off course. This is a fairly easy fix using the Joint Align Tool.
Just as a tip for best practices, it's a good idea to freeze your joints before applying ik or binding the rig in order to have a clean starting rig or possibly to help troubleshoot later if necessary.
Regarding best approaches for this rig - a spline ik is definitely a good base, but could certainly have it's functionality expanded.
Just as an example, you could easily achieve an effect where the snake could roll it's tail up (or it's head) by creating an fk chain of joints or nulls and parenting the ik spline controls underneath. This is a motion and pose that would be tedious to manually animate using the spline ik controls.
There are other features that you may want to add depending on the needs of your project, and these should be incorporated into your rig and built upon to suit your needs and preferences.
I hope this helps
I just tried that, and they all still seem aligned equally? I might be missing something though.
A Joint chain with the handles assigned like this? (Ignore the mess in the viewport haha)
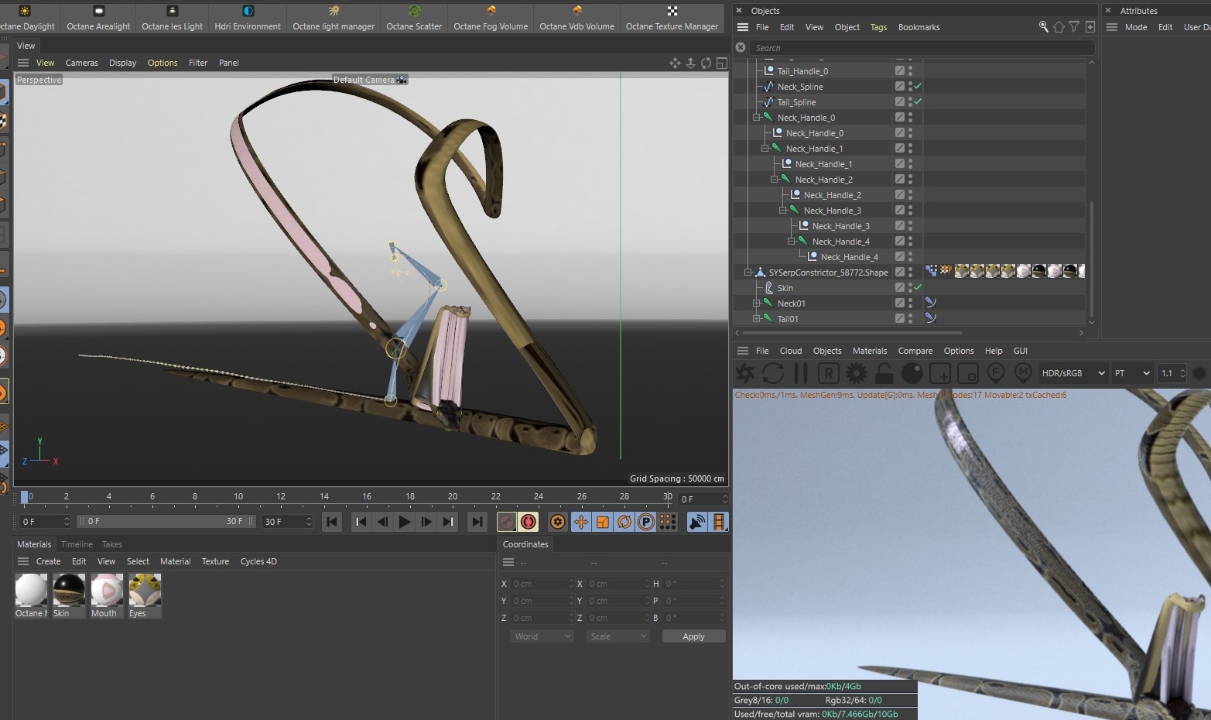
Well, it looked better before I took the screenshot; I hit an Undo after posing it really quickly and the end of the neck twisted in a way that wasn't *bad* but it wasn't how I had it prior to the Undo. After a bit of tinkering I ended up hitting Reset Bind Pose and all hell broke loose. Reloading the file it looked like this hah.
I found that all this time I hadn't seen that the model's Scale was set to 0.491, which was probably causing a host of issues but I'm not really sure how to fix that either except for repositioning things by hand. I might as well just dig back up the original exported file and start from scratch!
While it was working, it was working very well. Thank you for the advice about an FK Chain driving the Handles!
'There are other features that you may want to add'
As a beginner/novice with rigging, I'm not even sure what those features might even be; especially while I'm still sorting out comparatively simple things. Thanks again for the help!
0 -
On 9/9/2021 at 9:37 PM, Matches said:
I took a quick look at your constrictor scene, and the first thing I noticed was that in the neck chain, joints 23-41 were twisting off course and not keeping a consistent up axis. Once I fixed this, the rig behaved predictably without giving weird twists.
Try it for yourself and see if that helps.
Hey it's been a while, I was wondering if I could ask how you managed to find out how those were the trouble spots and how you fixed it?
Also, if I may - is this the best way to go about a rig like this? I'm still learning the intricacies of rigging in Cinema beyond the basics, but the only way that came to mind for me is Spline-IK. Which had its own host of issues I could never figure out and no tutorial online ever seemed to address. Namely, when posing or animating it, the body acting weird like that? If I needed it to climb up a tree or branch, or otherwise wrap around something, stuff breaks.https://www.artstation.com/marketplace/p/axNx/green-boa I recently saw this model and took a look at it, the rig setup was very different (Starting at head and moving down for instance and using Clamp Constraints; but it can't really perform movement beyond staying on the ground. Enabling either Object or World in the Spline-IK Twist section just makes each segment spin wildly.
Is this a job for Spline IK or is there a better way to go about making a good rig setup for a serpent?
0 -
On 9/9/2021 at 9:37 PM, Matches said:
I took a quick look at your constrictor scene, and the first thing I noticed was that in the neck chain, joints 23-41 were twisting off course and not keeping a consistent up axis. Once I fixed this, the rig behaved predictably without giving weird twists.
Try it for yourself and see if that helps.
How did you fix those? They looked fine to me at first and they only 'broke' once I started moving the helper objects and then things would start flipping around or twisting badly. The twisting part makes me uncomfortable since it makes it hard to animate any meaningful movement, but its also pretty tedious to work with 100+ joints so I might have to go and cut some of those and make it one long chain instead of a Neck, Hip, Tail setup like it shipped with, unless you'd recommend otherwise? The 'Hip' joint got deleted at some point it seems, making that horrid deformation in the middle
0 -
Well I guess I'll just stick with R23 until either (A) a release comes that's truly worth upgrading to for little hobbyist me, or (B) until R23 can't be launched anymore. Whether that's from an update to the licensing software denying you access to it or from the Doomsayers being true about C4D going under (For real and not just 'has become less used') - whenever or if either outcome actually happens

In the meantime, I'll be using R23 for as long as I'm able to. I don't want to have to think about the possibility of actually having to move to another program just yet with everything else going on on top of that
 0
0 -
Strangest thing, I go and open up one of the figures to recreate the situation I was describing, and its neck didn't flip its joint chain in reverse, but instead flipped upside down. The Z+ is going up the chain instead of down though, but it ends up deforming like with the dinosaur much earlier if I reverse their direction.
The snake figure looks like its not doing anything weird right now, but I remember doing something to it a while back, I just don't remember what - the only problem its having right now is the body twisting randomly when moving a handle (The setup is a temporary one, I've actually been meaning to re-work the rig setup since having 140+ joints didn't sit well with me)
I apologize for all these questions about a basic topic, I still feel I'm not much more than a beginner when it comes to a lot of topics, character rigging/animation being one of them. Actually felt hesitant to ask for so very long because I felt the things I would have trouble with were "too simple" of a topic to seek help over ahah...
0 -
11 hours ago, Matches said:
It's difficult to try and diagnose the problem without seeing the actual scene. Please upload your updated scene file and I'd be happy to try and help.
8 hours ago, everfresh said:my guess would be that your joints have a different scale than 1 before you applied the spline ik... but yeah, hard to tell without file.
I'll get a scene file up when I get home to my work computer; it's a problem I've had more than once, where a figure's neck will just flip backwards but things otherwise work fine.
0 -
A long while later, solution was something I had missed entirely somehow. Ctrl-D, Scale Project, scale it up by however much you need, then copy-paste the character into the new scene.
0 -
On 6/18/2021 at 2:06 AM, Matches said:
Hi, SYLXERIA
Having looked over the file, and not seeing the initial setup, my guess would be, that the joint orientation was setup with the z axis pointing up the chain instead of down, which caused all of the joints associated with the ik spline, to flip approx. 180 degrees around each one's respective x axis.
When setting up an ik spline chain, make sure all the joints' alignment matches the axis in the ik spline tag's align field, and that they point with their positive side facing down the chain, from the root to the end.
If you have an earlier version of your scene, take a look and confirm the direction the joints were facing before you applied the ik spline tag, and see if that fixes the problem.
I hope this helps you
Again with a problem and months later but; what do you do when the chain just flips into reverse? I've tried the Z pointing up the chain, down the chain, every time the whole neck hierarchy just goes and reverses itself and the head ends up in the chest. Are the X/Y axis supposed to be in a certain direction too?
0 -
2 hours ago, Cerbera said:
Collision deformer is almost certainly not the way to go here. That could not even begin to deal with a whole forest of kelp without grinding your system to a halt and cannot work within cloners.
You didn't say what your kelp was made from, but one idea might be to make it using hair and instanced geometry, That is relatively faster to calculate with a hair collider placed on the shark object for example, but you many run into issues with collisions failing if the kelp geo differs significantly from the hair driving it. It also has the advantage of being anchored at the base by default.
Otherwise you could also try regular dynamic collision, using dynamic connectors to anchor your kelp to the floor. That works with cloners !
Yet another plan would be to use cloth, and cloth colliders - that can be anchored via fix points, and if you turn gravity off, or make it positive, and use a turbulence or wind force you may be able to get some decent underwater movement into it as well.
CBR
I had a little luck with the Hair approach, don't know if something's wrong with the collider though or if I'm just doing something wrong - had to give up the placement MoGraph had setup with a Noise Shader falloff but a weightmap could probably achieve the same effect?
I know absolutely nothing about the Connectors dynamic so I passed by that one, haven't given the Cloth approach a go just yet.
It's given me a lot of extra ideas for future projects though, it's one thing that I loved about the old C4DCafe was seeing people's techniques and solutions to problems or obstacles that maybe someone didn't think of!
0 -
42 minutes ago, Cerbera said:
Collision deformer is almost certainly not the way to go here. That could not even begin to deal with a whole forest of kelp without grinding your system to a halt and cannot work within cloners.
You didn't say what your kelp was made from, but one idea might be to make it using hair and instanced geometry, That is relatively faster to calculate with a hair collider placed on the shark object for example, but you many run into issues with collisions failing if the kelp geo differs significantly from the hair driving it. It also has the advantage of being anchored at the base by default.
Otherwise you could also try regular dynamic collision, using dynamic connectors to anchor your kelp to the floor. That works with cloners !
Yet another plan would be to use cloth, and cloth colliders - that can be anchored via fix points, and if you turn gravity off, or make it positive, and use a turbulence or wind force you may be able to get some decent underwater movement into it as well.
CBR
Thanks for the advice - I neglected to mention that the kelp that'd be colliding with the shark were 2D planes with transparent images on them, already using a Wind object to make them sway a bit so cloth or hair sound like they could work quite well.
I saw someone use the Hair 'trick' to make a full fledged tree have its branches sway in the wind once - I'm surprised this didn't occur to me to try using it here too. Not 100% certain how I'll approach that here though just yet, since I've never used Cinema's Hair before but at least I have some ideas to work off of now!
2 -
One of those topics where I don't know how to ask it or even what to search for.
What I'm trying to achieve is an object being pushed back by another object passing by. In this current case, its a shark passing through a kelp forest and the kelp's pushed aside.
I've tried using the Collision Deformer and having a primitive be in place, but the cloned objects don't react to it, and I'm not sure how else I can approach this since I'm still relatively green with Mograph right now. I do have X-Particles as well, so if Mograph can't accomplish something like this I can research into that as a solution as well (Not that I'm much more experienced with XP)
Any thoughts?
0 -
For how deceptively simple Spline-IK is, I seem to have the most troubles understanding it. Recently, I had a pair of snake models I exported out of DAZ, and given the lengthy body shape it seemed Spline-IK was perfect for this.
Despite setting everything up in a way that looked 'right', one of the two would have its entire front half fold into its body in reverse for some weird reason. Disabling the rig, re-setting the Initial Pose, and renabling the rig would 'fix' that though when nothing else was working for reasons I do not understand.
However, lately there's been a few times when I've needed to scale a figure UP, which has again also been a very touchy experience for me. Usually it works, sometimes it doesn't. In this case, here's what I get when I scale this serpent up:
The spline scales up along with everything else, but the IK sort of gets broken. Through some trial and error I found that scaling down the spline a bit afterwards mostly fixes it, but is there a better way to do this if/when the need to scale something up or down comes up?
 0
0 -
On 7/13/2021 at 10:13 AM, Igor said:
You probably cant do much and its probably just a bug you need to deal with, unfortunately. It would be best to report this to Maxon and hopefully they find a way to fix it.
P.S. You don't have to be shy, we don't bite!

Yeah, it's a non-fatal bug so I've been living with it, after changing to a desktop I haven't had it happen so it might have been my GPU model if anything! (GTX 1060 to an RTX 3080)
Also sorry for the terribly long response - thank you for the welcome ;v;
0 -
I understand the dislike for Subscription-Only software and don't care much for them myself, though I'd still be stuck on R13 Visualize if it wasn't for the C4D Subscription. Small hobbyist here so I don't make huge $$$'s with 3D or my job, but the sub still only takes a minor dent out of my monthly income. I switch it off if I need to but usually keep it on since I love using it. Though I fully agree on the topic of performance and focus on specific features and their stability before moving on to adding the 'next cool thing'.
I've seen where Blender's been going for a while, since all but two of my friends that are into 3D use it (One's using Maya, the other Lightwave), but I myself have absolutley no interest in using it. If/when the day comes where Cinema 4D shuts down for good and you can't launch it anymore? I'd probably just set aside 3D and focus my efforts on improving my drawing/painting skills.
I guess I've got a very different outlook on the software since I'm not involved in 3D for production and business, and the things I use it for work well enough for me so I rarely run into a situation where I'm displeased or even angry at the program, or feel like leaving it behind in favor of something else..
2 -
3 hours ago, Matches said:
Hi, SYLXERIA
Having looked over the file, and not seeing the initial setup, my guess would be, that the joint orientation was setup with the z axis pointing up the chain instead of down, which caused all of the joints associated with the ik spline, to flip approx. 180 degrees around each one's respective x axis.
When setting up an ik spline chain, make sure all the joints' alignment matches the axis in the ik spline tag's align field, and that they point with their positive side facing down the chain, from the root to the end.
If you have an earlier version of your scene, take a look and confirm the direction the joints were facing before you applied the ik spline tag, and see if that fixes the problem.
I hope this helps you
That was the initial setup actually, but yes that fixed it! It's surprising that I overlooked that for so long but it feels obvious now that you pointed it out.
The idea that the joints in the neck would need to have the Z axis going UP the neck opposed to the tail joints having the Z going DOWN it instead of the whole length being aligned the same never really crossed my mind until now.
Now that you bring all this up, it does make sense - since the tag is applied to the base of the Neck going up, in reverse of the direction the Z axes are pointing. So reversing them was one solution, maybe putting the tag at the bottom of the neck chain and have it going down would have been another. Either way, it's solved now.
Thank you again, very much - it's one of those 'simple questions' that's been bugging me for so long, and it's finally been answered!0 -
6 hours ago, Matches said:
SYLXERIA if you could post a your scene, I wouldn't mind taking a look and trying to help.
That would be absolutely amazing if you could, thanks for the offer! I'd also really appreciate just being able to know more about the How's and the Why's of all this, since the worst and most frustrating part isn't necessarily "It's not working" but not knowing why it's not working. I watched a few YouTube videos on Spline-IK, watched the portion of GSG-U's Intro to Rigging tutorial (Never understood that xPresso setup that called for specific coordinates. Wouldn't that break the rig if the character moved from its neutral position since the coordinates are now different? Or is it Relative?) and in all cases it just looked simple. So I follow that setup and usually it works, but when it doesn't I don't know why.
I know it's dependent on the joint alignment but to the best of my knowledge this dinosaur's neck is aligned properly - or at the least, isn't aligned any differently than other parts of models where the Spline-IK did work correctly. Having a fix would be great, knowing how to fix it myself next time would be better - if you know what I mean
The last thought I had was maybe it's because of the weighting, which I'm still fixing since it was imported in through DAZ's Bridge, which is currently having some 'issues' - mostly with older content.
0 -
Over a week and no responses
Rather disheartening...
I have a similar'ish problem as the OP, where I have a creature with a long neck. It's curved a bit, but I didn't think that'd matter. Put spline in, assign Spline-IK, watch as the neck flips upside down without warning.
I used the same approach as I've used on monster tails and stuff, checking alignment of joints and etc.... Works there, messes up horribly here. I'm struggling to understand how this feature works and why it doesn't when it doesn't.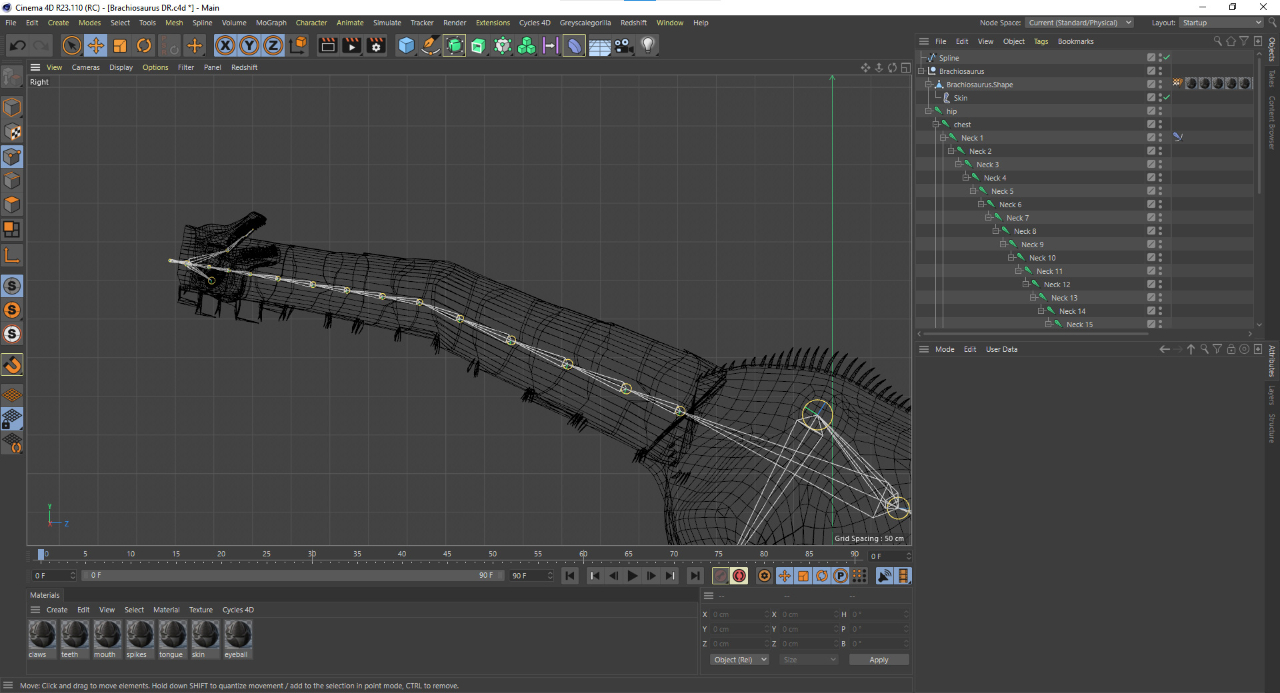 0
0 -
Hey, this is my first post on the new forums - I had posted a bit on the old Cafe forms, but I digress.
I'm a little shy to ask questions, but... Here goes.
So, I've been using Redshift a whole lot since picking the C4D subscription that included it with Cinema. However, every now and then the Material Preview icon will turn black and the Redshift Feedback will put out an error "Preview Scene does not contain the Preview Object". The preview will be a black/blank image, but the scene renders fine - it's just the preview.
Auto-Refresh Previews in the Shader Graph is enabled. The RenderView and IPR are not running. The preview icon is a completely blank image in both Cinema's Material panel, the Attributes Panel, and in the Redshift Shader Graph.\
I tried following the steps in a video about fixing black preview images, but it didn't change anything.
I've ensured that Redshift is fully up to date as well. Sometimes it'll do this, sometimes it won't.
The mysterious part is this though: It only happens for the "Sphere" and "Default" preview models. Every other preview functions perfectly fine - Cube, Rounded Cube, etc. It also only happens for Redshift - Advanced Render and Cycles4D never provide this error.
What else can I do?
0
R25 - Loading ABR brushes?
in Miscellaneous - Do Not Post Here
Posted
The only time I've really felt like using BodyPaint was to try out this method someone was using for 'painting' terrain almost like you would in a game engine like Unity. Had the material layers then just masked them, so you'd have your sandy beach, your dirt paths, etc.
But for dedicated painting yeah, I wouldn't use BodyPaint either. Though if there's a better way to do terrain texturing, I'd love to hear it