
Rectro
-
Posts
3,798 -
Joined
-
Days Won
102
Community Answers
-
 Rectro's post in Camera lens texture. How to create? was marked as the answer
If you have no lens geometry and want fake it, then do as follows.
Very quick job here, few min, but make your lable in Photoshop, apply it as texture in C4D. Better results would be to model the main forms, apply the proper materials and render/bake that out. Programs like Substance painter comes in handy here. You can paint materials then bake them inc lighting, reflecting, spec e.c.t
-
Rectro's post in Are you able to have two pose morphs on one polygon object? was marked as the answer
Ok after having a look it was more complicated that you had mentioned, your using 2D vectors as drivers and have two pose morph objects on a single object. After removing the eye pose morph object and added a new morph to the mouth pose morph object which closed the eye there was no issues. So it looks like you have one pose morph object overriding another. Each pose morph object has a base pose and the morphs refers to that, but you have two Pose morph objects so each time one gets used it resets to the base pose of the other.
Solution is to use one single Pose morph object so all morphs can work with each other.
Dan
-
-
Rectro's post in Mixamo import - how to change position of 'motion source' animation was marked as the answer
This should explain how to do this. Its all down to making a pivot object for the next clip to it can be moved to start from where the last clip started from. In your case you will need a pivot for the run as to make the character move forward, then when you add the second clip the pivot for that position will be further forward.
Dan
-
Rectro's post in What does the reflectivity option in reflection do? was marked as the answer
The Metalness Value is white = 1 for 100% metalness, and 0 Black = zero metalness i.e dielectric. When you look at the Substance metallic map your see white for 100% metalness.
When you use Substance textures you do not use the tint/reflectivity colour if the Metalness value is 100% or if your using a Substance map, the colour is now fully taken from the diffuse colour map. "A 'Metalness' value of 1.0 also means diffuse lighting is disabled and the dielectric 'Reflectivity' color is ignored. (quoted from manual)
When you use a value of 0 = black for Metalness then the Reflectivity colour is mixed with the Diffuse colour because now its non metalness and is now dielectric. If you chose to put the diffuse weight at 0 at this point the Reflectivity colour fully takes over This is handy for when mixing one surface between metalness and non metalness dielectric surfaces.
Applying absolute colours, no texture maps your see how I got a Green metallic metal with a blur reflection using 50% Grey for roughness.
This time we are using a different method of Fresnel Colour - Edge Tint. This method is not using diffuse colour like Metalness method did, it is using reflectivity colour. So you see these settings work different to different types of fresnel.
Dan
-
Rectro's post in How to unbind model without losing the pose? was marked as the answer
Hi
If you never wish to pose it again and freeze the pose into the geometry then select the mesh, right click on it and chose the option (current state to object) It will create a duplicate where you can work on that model.
Another way is to select mesh and skin tag, right click and chose (connect objects and delete) This will do the same thing.
Dan
-
Rectro's post in What modeling approach? was marked as the answer
Here is one example. This is only a mock up in 15min but you should get the idea that with literally just sphere, using extrude, FFD deformer, Grab brush, Smooth Brush, SSD tag I got to this. See steps.
-
Rectro's post in Exporting Alembic file of Mixamo character using motion tracks was marked as the answer
-
Rectro's post in total noob question on character animation was marked as the answer
After having a look at your file I have concluded that your scene is corrupt. When things dont work and makes no sence as to why try copying the whole scene content and paste it into a blank scene.
I removed the object from the bind list, deleted the skin object and dragged it back in and it done the job. In your scene it was not weighting the joints to the mesh. The way you can check this is to hold Shift key and double click on the weight tag, this opens the Weight Manager. clicking on any joint from the joint list should highlight the mesh that joint is bound to, if it dont then its not bound.
To sum up.
1: Select everything in the scene and cut it.
2: make new scene, and paste
3: remove skin object from mesh
4: Select the Character object and go back to the bind stage and remove the bind objects.
5: Drag the mesh back into the bind box.
PS: your model is 14 feet tall, so unless you intended this to be a giant I would scale it to real world scale for the sake of other scene scaled items, lighting, shading and/or dynamics.
Tip: If you want to create the components closer to the scale of your character, before you start adding components go into the Basic tab of the Character object, and uncheck (Auto) scale. Copy the Scale of the Y axis values from your character and paste them into the scale box. As you create the components they will match the scale of the character better.
Dan
-
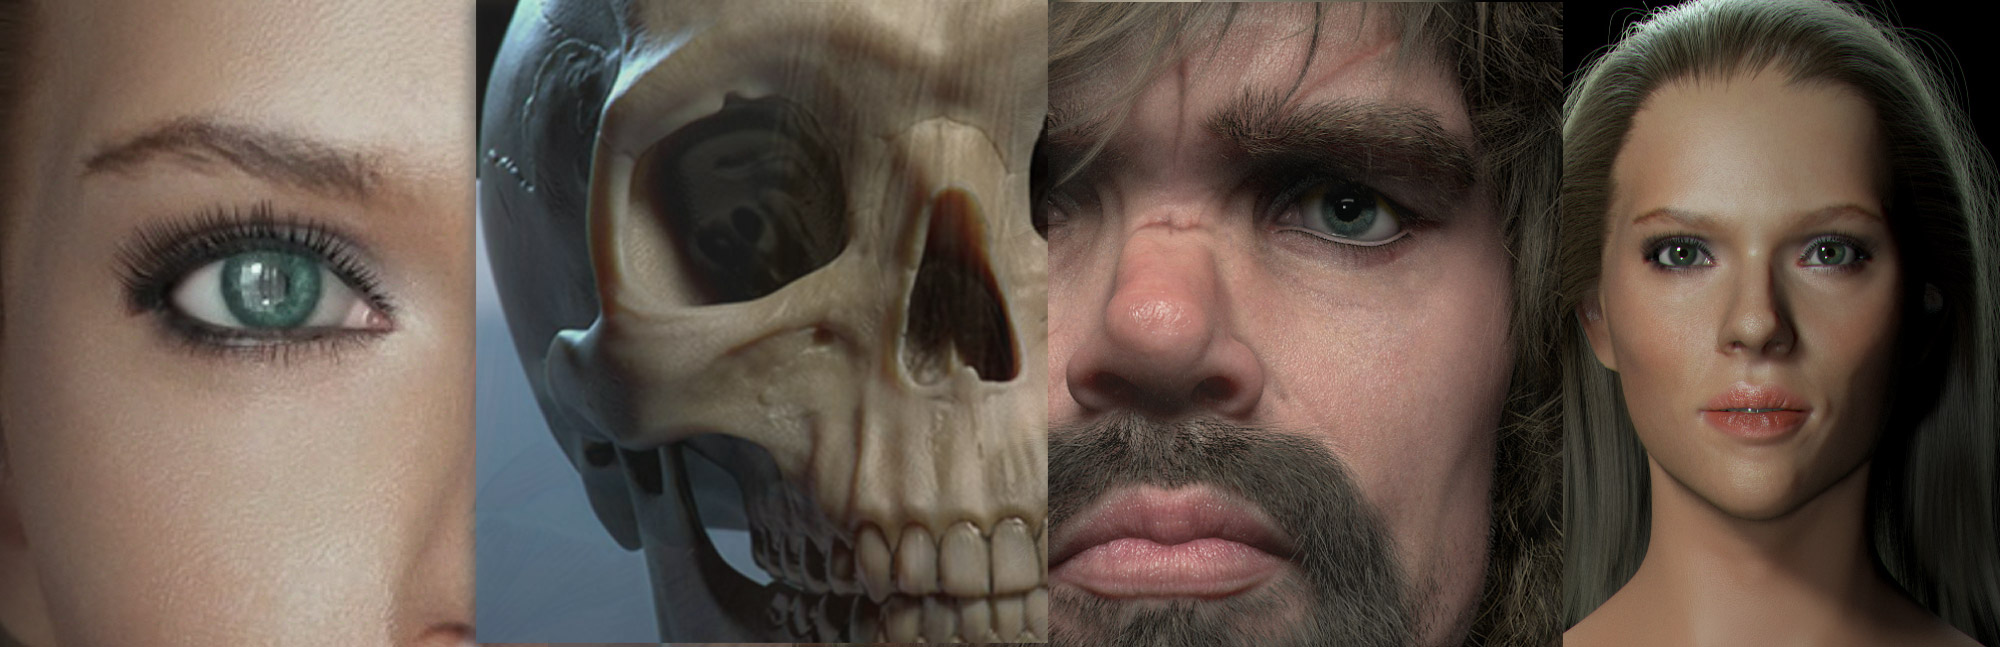
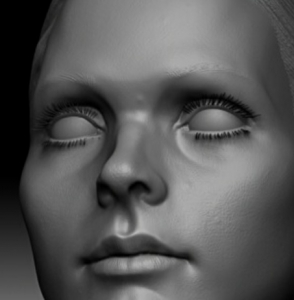
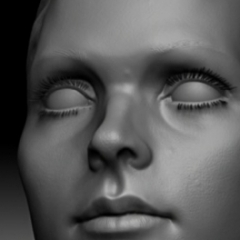
Rectro's post in Anatomy of female head was marked as the answer
Hi. Nice go at the female head and well done for taking on the female head as its much harder than a male head. I like what you have done with this sculpt and in order to make it even better here are some things to consider on your next sculpt.
What I will do for you as you have shared the file if you like I can make a video on your model, this will help much better than what is typed as there is alot to cover.
I will cover the proportions of the skull, using guidlines for placement of features, and anatomy of them features. Before I do this I will post some images of my study that should help.
If you divide from the peek height of the head which should be above the ear line to the chin into 8 equal units, and take this measurement then use this from the brow bone to the back of the cranium it should measure 7/8 of the height of the head. This gives you the height in relation to the depth.
To get the width you divide the height of the head into 3rds, thats 3 equal units. Take 2/3 of this and it will give you the width of the skull which is further back above the ears. Normally for one on one lessons I start with the skull and teach every bone of it then continue to speak anatomy vocabulary, but I will refrain in using anatomical names as it may throw you off. You must learn the skull otherwise if you done know what forms there are and have no names for them they you wont remember them.
Dan
-
Rectro's post in Marvelous Designer to Cinema 4D animation workflow? was marked as the answer
Hi
Im using MD8. In this version you have a UV editor. In there right click and click select (Set Uv from pattern alignment.) Select all and shrink to fit within the UV space 1:1.
Export with Unified Uvs on as Alembic. Bring this into C4D and select clothed object and make editable. You can now select the polygons for individual clothing by double clicking on the geometry in Polygon selection mode or doing the same in the UV view. When selected make a new material and assign it to th selection, a selection set is made for it automatically. You can now do the same for all other clothing.
Dan
-
Rectro's post in other programs to use with cinema 4d was marked as the answer
Hi.
What's your end goal is a good place to start. Post some examples of your aim. Is it for still renders or animation? Its possible to get very good results in C4D alone but your skills need to be high enough to overcome the tools short cummings when compared to other dedicated software solutions. The reality is the artist will become a limit before the tools in most cases.
Human, creature, or hybrid when it comes to "realistic" and believable will be set very early on in the process, way before any surfaces get added or texturing. Its in the anatomy, posture, and pose. Done well a clay sculpt can look outstanding, while a badly done fully fleshed out render can look bad because its in the basics where life is added and that comes from the foundations of Human and Animal anatomy, there is no short cut, no other way around it. Where to start? Sculpt torsos, study the skull, sculpt the skull, then expand out with the skeletal system.
Dan
-
Rectro's post in how to uv map a sculpted head ? was marked as the answer
Hi
Your base mesh which you have sculpted on is too low. It holds very little form. Like as you have done you can sculpt on this, as you have found out it needs 8 levels. The less geometry your base mesh has to hold forms such as ears, nose, eyes and mouth the more work eventually the displacement maps have to do at render time,this can result in render issues and lack of quality. Your base mesh will always need to have a Uv map before you bake any maps as the baking process is Uv map dependant.
Baking the displacement maps will do its process based on what you set in the baking options. If you wish to have your base mesh at level 3 you can set this so the map is calculated between lev 3 to 8. The baking process can also produce a brand new mesh with maps applied so you be retaining the original sculpt. The new mesh it creates is just a copy of your original at the set sub d level.
Now if you want ultra high quality then you will need to produce a brand new retopologized model using the Polygon Pen tool, over the high res sculpt. This entails producing nice neat loops around areas of the face. This new model will hold some of its own forms at the base level mesh which requires the baking process to do less, and hence better results will show. You can then chose to bake the high res sculpt onto the new retopo version, the results will be much better.
The workflow is all down to what your end goal is. The Video Bezo posted shows most of what I have mentioned I think your find.
Dan
-
Rectro's post in general workflow for creating 3d character's face was marked as the answer
Hi
The steps are to sculpt it, then retopologize it using the Pen tool, this will give you a lower res mesh and better edge flow especially around eyes, lips and nose. Next is to Uv map it which is much easier.
Once you do this you then can move onto texturing it.
If you want a extra tip here learn some anatomy starting with the skull, this will give you a better foundation of the shape and avg proportions.
Dan
-
Rectro's post in Combine two Mixamo clip playing together. Play Guitar While Walking. was marked as the answer
This video should explain it.
-
Rectro's post in Pose Morph to external Morph Target was marked as the answer
Hi
It all works with the method shown below. I think you had moved the head in component mode. Follow steps and it will work fine.
-
Rectro's post in Toon Rig Eyes Problem was marked as the answer
Hi
I can scale them just fine, make sure your in Animation mode.
Quoted by @Everfresh the maker of this rig.
"if you want to use your own eyes, just find the eyeball meshes by filtering for the word eyeball, hide those and put your own eyes as a child of those joints the eyeball meshes are in... the pupil and iris scale function won't work then anymore, so you'd have to rig that up manually for your own eyes if you need it..."
-
Rectro's post in Set Roots issue was marked as the answer
I do still see some slight shift here and there but its no where as bad. What Id suggest is to work in say meters or another unit on import, or take note of current scale, add a note tag for instance of say the X axis then scale up the scene as shown in this video. You can then scale after project is done to original scale and hair should adapt fine. I will report this as a bug and if you dont mind will send this scene to MAXON as it demos this issue perfect?
Dan