
rasputin
-
Posts
1,167 -
Joined
-
Last visited
-
Days Won
8
Content Type
Profiles
Blogs
Forums
Gallery
Pipeline Tools
3D Wiki
Plugin List
Store
Downloads
Everything posted by rasputin
-
Please register for full access
-
Please register for full access
-
From the album: Rasputin Gallery II
Corona 3 Render, 76 passes. -
 Абсолютно красивый во всех отношениях, Евгений. Изысканные, маслянистые цвета и освещение. Масло-желтый на стульях и нежный зеленый цвет пианино-бархата являются изысканными. Вы даже пропитали стулья нежной парчой. Браво.
 -
From the album: Rasputin Gallery II
Corona 3 render: 23 passes -
From the album: Rasputin Gallery II
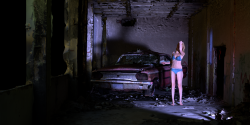
This scene, rendered with Corona 3, 100 passes. Here I am experimenting with pre-made photogrammetric objects... ie., the building, car and woman were realized from real-life using photogrammetry. The scene setup and lighting, though, are mine. -
 Thanks so much, VH!
 -
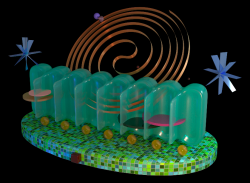
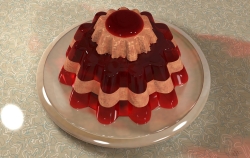
From the album: Rasputin Gallery II
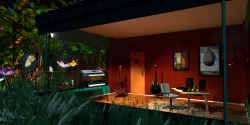
All objects modeled by hand in C4D (except for the chair and foliage). Corona 3 Render, 100 passes. -
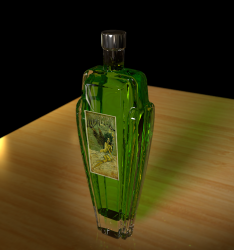
From the album: Rasputin Gallery II
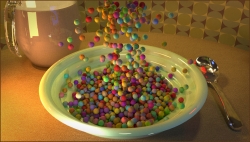
I am loving R20's new Voxel Building function... It's great for things like glass. I built up this bottle using Voxels. -
Please register for full access
-
Please register for full access
-
Please register for full access
-

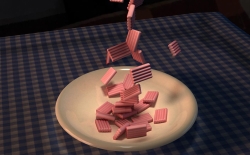
From the album: Rasputin Gallery II
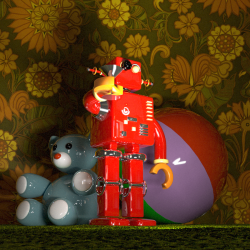
My old friend Dean had a birthday in South Africa today. So I made him this little "birthday card". -
From the album: Rasputin Gallery II
R19, Corona Render, 64 passes. About 35min. -
From the album: Rasputin Gallery II
R19 Corona Render, 46 passes. -
From the album: Rasputin Gallery II
Modeled this myself in R19. -
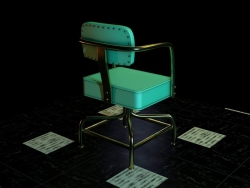
From the album: Rasputin Gallery II
R19. -
From the album: Rasputin Gallery II
Modeled in R19, Corona Render, 64 passes. -
From the album: Rasputin Gallery II
R19, Physical render, 64 passes. -
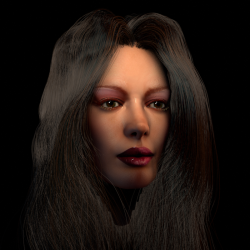
From the album: Rasputin Gallery II
My latest attempt at doing a 3D head in C4D. November 2018. The head mesh was modeled and morphed in POSER 8, but all the rest was done natively in C4D R20. Physical render, 46 passes. About 30min render time. Physical Render can now anti-alias Hair properly, I see. -
Please register for full access
-
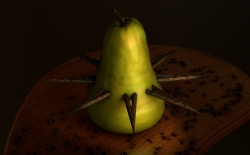
From the album: Rasputin Gallery II
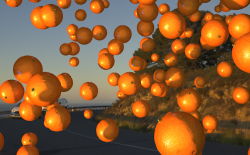
Physical render, 46 passes. Here, my goals were to see if I could: paint my own orange-peel material in Photoshop, just to see if I could manually recreate the look, instead of sourcing a real photograph match the 3D objects as closely as possible to the existing light of this HDRI for a convincing composite use EMBREE SMALLER, just to see what it does use Volume Mesh to create that little "navel" object on the orange play around with different anti-aliasing filter settings to gauge the effect... finally settled on 2+2 use three layers of Reflectance in order to best simulate a naturalistic falloff on the orange (as a sphere) -
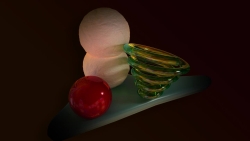
From the album: Rasputin Gallery II
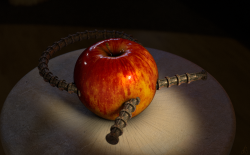
A study in contrast of textures. (Oct. 10, 2018) Physical Render, 50 passes. -
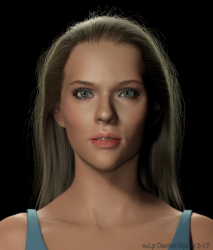 Excellent work, Dan! You did the right thing of making her sclera (eye whites) not too white. That is the #1 thing that 3D portraitists get wrong. And you didn't go overboard with the SSS... quite correct.
 -
Please register for full access