rasputin
-
Posts
1,167 -
Joined
-
Last visited
-
Days Won
8
Content Type
Profiles
Blogs
Forums
Gallery
Pipeline Tools
3D Wiki
Plugin List
Store
Downloads
Everything posted by rasputin
-
Wowee, thanks, guys. I see I am not alone in wondering this, which is reassuring, haha. I'll try using the correction deformer approach. It never occurred to me that a Volume-built mesh could be considered just another Deformation.
-
Hey gang, This is definitely a dumb n00B question... The answer is surely simple, if only I could figure it out. I'm building compound Volume objects, using the new R20 Volume Builder approach (see screencap). When I drop my mesh objects as Children of the Volume Builder, the Materials they had been earlier assigned are no longer visible, either in Viewport or render. In this case, my array of cones should be red; my sphere, blue. But the compound Volume object created is just whitish. What's the trick to getting your individual Volume objects to retain their Material? (I will probably kick myself when it's shown to me). Thanks, ras
-

From the album: Rasputin Gallery II
Image made in R19 with Corona Render 1.7 Beta. -
yeppers, that was the plan! The image is based on a 1969 photograph I tried to semi-replicate.
-
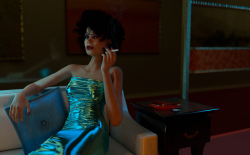 "CIGARETTE". 9/23/2018. Rendered with Corona for C4D Beta. 64 passes== 1hr rendertime.
 -
From the album: Rasputin Gallery II
-
Hey guys, Here's my latest scene, modeled, lit and textured within C4D. The dress and pillow were made in MD, but textured in C4D. Corona render, 64 passes, about 1hr. ras
-
 A scene I created and rendered in September 2018. Corona Render Beta for C4D== 64 passes, about 1.5hrs.
 -
From the album: Rasputin Gallery II
-
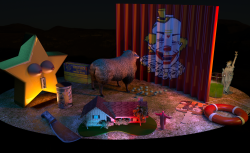
Hey guys, Here's a new scene and render I created this week, using the Corona Beta for C4D. It's called "Memorabilia". Corona Render=64 passes, about 1 hour render time. Most of the models and textures are mine, three are imported from a free 3D models site: the sheep, Jesus and Lady Liberty. I'm really lovin' Corona! It has a "buttery" look to it that I like... their AA is lovely. And I love their light falloff, too. Click the image to enlarge it a bit. ras
-
Somewhere online there is a plugin called "Corona Tools". I think the plugin is now discontinued, but it's still floating around out there. With just one click, this pluggie will change all your C4D Materials and parameters to the Corona format. Takes about 3 seconds. I did it just today, as a matter of fact. Really works.
-
It only took about 20--30min to do 64 passes, which is what they consider to be a full, thorough render... even though things already look very good by the time you reach 34 passes. I like the look of Corona... the light falloff looks real to me, subtle where it needs to be, and the AA always makes everything look buttery-smooth. I have to say, I like the way Corona is very straightforward to use... it's kind of foolproof, in fact. Not a surfeit of knobs to twiddle to make things happen. You just set up your scene, light it, and go. It's never given me an ugly or wrong render, never adds artifacts or weirdness. Never looks toon-y, 2-dimensional. Corona also does a beautiful DOF, I find. It can use all your native C4D shaders, and 3rd-party shaders, too, which is cool. Supports Layers and vertex maps en all. Corona's SSS looks very good... more organic and subtle, I think, than C4D's.
-
Out of curiosity this morning, and still learning all the little features of the Corona for C4D Beta, I wondered if Corona could render out C4D Hair. I was dubious, since C4D's Standard Renderer has, for a good while, always produced the best-looking Hair... ie., that looked silky and natural, like real hair. But to my great surprise and pleasure, I see that Corona can indeed render out C4D Hair... and it looks very good indeed! There is a bit of a workaround in setting it up, though: Your C4D Hair object needs to be set to Generate, and then you have to choose one of its Generate styles. I chose the Circle Type, which causes each strand to be rendered out in what I take to be basically a circle spline swept over the individual "virtual" hair splines. In the OM, your Hair object has to include both a C4D Hair Material... and also a Corona Material, side-by-side. In the Corona Material's Diffuse Channel, I entered the C4D Polygon Hair Shader, then set that shader to Illumination--->From Hair Materials. The Corona Material will take all its features from the C4D Hair Material, like Color, Specular, Thickness, Scale, Curl, and all the other options. But then, with the Corona Material, you can add further channels: Corona's native Reflection, Translucency, and Diffuse colors. My biggest worry was that Corona Render would not give the C4D Hair all the lavish AA that it needed to make the hair look silky, shiny, and not like straw, noodles, tentacles or needles. That was always the Standard Render's strength. But hey, I was pleasantly surprised: Corona antialiased the Polygon Hair strands beautifully, as you see here. Cool. ras
-
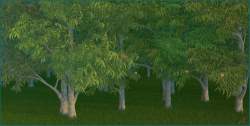 Haha... and yes, a fairytale story was exactly my purpose. How tacky-- deplorably mundane-- would it look if a fairytale character ambled through a highly realistic peach orchard scene?
 -
From the album: Rasputin Gallery II
Image lit by an Infinite and an HDRI sky dome. The C4D VARIATION shader did a good job of adding subtle color variations to both the tree-leaves and the blades of grass. -
From the album: Rasputin Gallery II
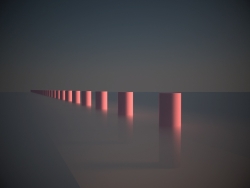
100 pink pillars, receding into the distance. -
From the album: Rasputin Gallery II
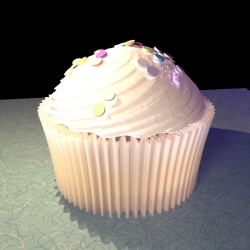
My model and texture of a cupcake. With the colored sprinkles, I am making use of the new Variation Shader, which makes doing multicolored objects a snap. The paper cup includes the Backlight Shader, and the frosting includes some Subsurface Scattering. -
Wow... huge selection, Teknow. Are them some fully-rigged figures in there?
-
 The Physical Engine render looks warmer somehow, smoother; the VRAY version has a lighting which looks a little harsher, more unforgiving. That said, I suspect the VRAY version is a little more true to how such light would behave in the real world.
 -
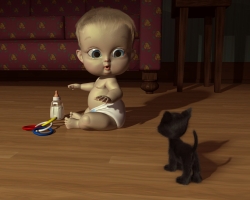 It's so funny the way babies go through a phase in which it appears that their head and eyes are way-y too big for their bodies... ((-;
 -
How do I get a Texture-only view (no UV mesh) in BP UV EDIT?
-
R13: Okay, what's that little plus-sign in the Viewport for?
-
 Very nice!
 -
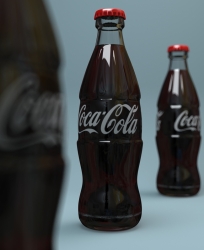 Green glass needs to be thicker (the liquid more recessed inward). Your specularity is too broad and shiny... maybe dial the Spec width a good bit thinner? Otherwise a very interesting image.