
rasputin
-
Posts
1,167 -
Joined
-
Last visited
-
Days Won
8
Content Type
Profiles
Blogs
Forums
Gallery
Pipeline Tools
3D Wiki
Plugin List
Store
Downloads
Everything posted by rasputin
-
 Nice point-of-purchase display!
 -
@3DKiwi Yes, somebody really needs to author a big book or video course on XPRESSO.
-
 Great sense of character. You're a real artist.
 -
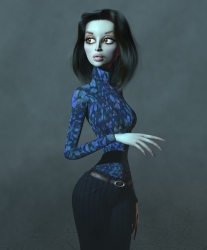 Excellent. Character really comes through. Cool choice to not only dress her in blue... but to illuminate her in blue, too.
 -
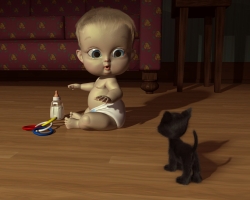 I love this. Kind of surreal. Nice composition of the still, too.
 -
