
rasputin
-
Posts
1,167 -
Joined
-
Last visited
-
Days Won
8
Content Type
Profiles
Blogs
Forums
Gallery
Pipeline Tools
3D Wiki
Plugin List
Store
Downloads
Posts posted by rasputin
-
-
Thank you so much, cerbera!
0 -
Hi guys,
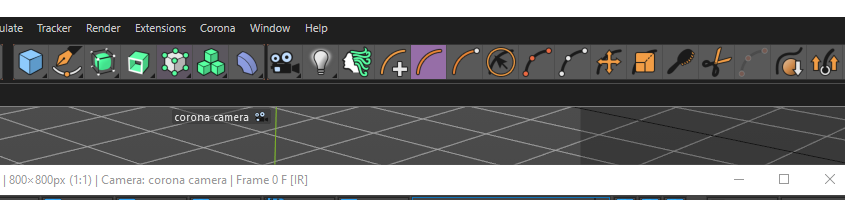
I have a very basic question about the icons in the upper strip menu, above the viewport.
I am in the process of organizing that strip palette of icons to my own customization. Sometimes I'll want to add my own custom icons to that palette. I know how to do that, no problem.
Notice how the C4D default layout includes some "unfoldable" icons, bearing a tiny black arrow. You click that icon, and a whole sub-menu of several icons becomes visible.
But when I add my own custom icons up there, I can only place "single use" icons. Question: How can I configure things such that I can also place my own "unfoldable", multi-icons up there? For example, I would like to have one icon up there unfold to reveal several HAIR-related Tools.
I hope this makes sense. It may be that there's something more I need to understand, and that's appreciated, too.
Thanks, ras
 0
0 -
Of course... let me do that...
0 -
Thanks, Srek, let me try that.
 0
0 -
Hey Gang,
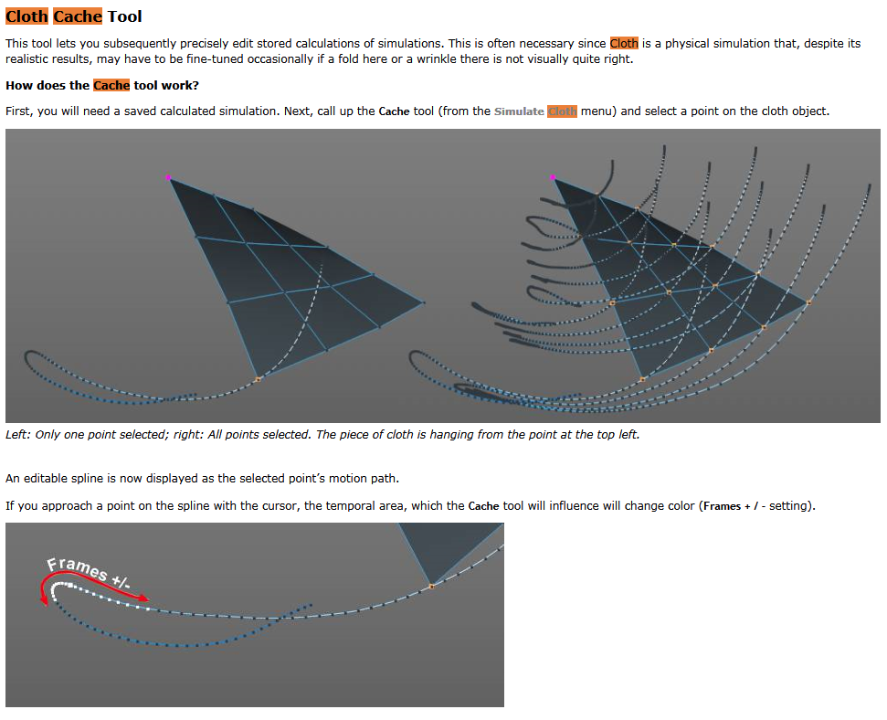
I've used C4D Cloth dynamics for many years, but I've never used the "Cloth Cache Tool" function.
The Helpfiles describe how you can animate your Cloth object in a more predictable or desirable way. It involves this process of first hand-selecting points on your Cloth object... then drawing little "guide splines" in the Viewport which are supposed to make your Cloth fall/drape in a particular way (see my screencap of Helpfiles page)
Try as I might, I can't seem to make this process work for me... Not sure what I'm doing wrong. Have any of you managed to make Cloth Cache work? All thoughts and hints welcome here.
ras
 0
0 -
On 5/8/2021 at 6:18 AM, chege said:
how did u do that i hv been trying to make the hair move less and stay in one place plz give me a tip
The trick is manipulating two of the Hair dynamics parameters: Rest Hold, as Rectro points out, above; and also Drag. The higher your assigned Drag percentage, the more restrained and predictable is your animated Hair's fall... ie., the hair droops in a more uniform, graceful way, with no wild "flyaway hairs". Of course, if Drag is TOO high, your hair starts looking like it's moving in heavy syrup. 10% Drag is all you need here.1 -
On 5/5/2021 at 1:04 PM, Cerbera said:
Yes but OP doesn't have that in his version I think.
CBR
I'm using Corona as my renderer, and Corona 6 does indeed have a shader that purports to be Triplanar. It does seem to disguise the seams in objects assigned a Cubic UV mode...1 -
Thank you so much, cerbera!
0 -
Hey guys,
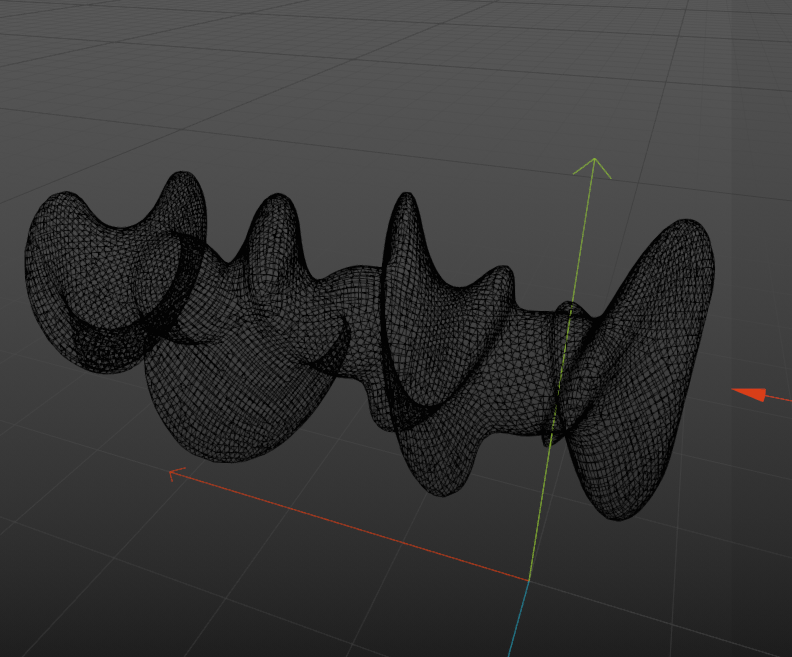
A real dumb n00B question. Here is a funny object I've made... it means nothing and refers to nothing, it's just a random shape. Attached here is also a wireframe view.
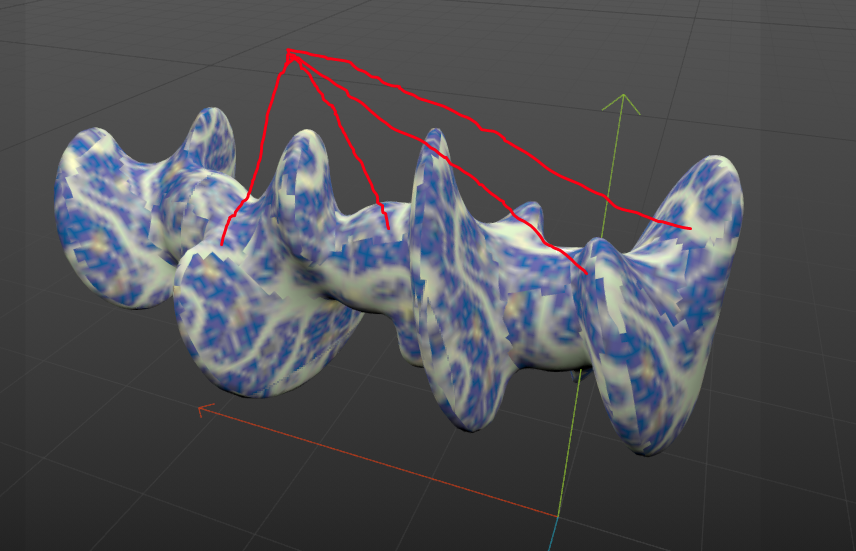
Applied to it is a texture in Cubic Mode. I do understand the vagaries of texturing in 3D... things often cannot be UV'd precisely, so C4D introduces these "joins" or "seams"... places where your texture is going to be disjunct. (Unless you organize otherwise in the UV editor, of course.) I've pointed to a few with red lines.
My dumb questions are:- What is the correct 3D term for these "seam lines" or "join lines"? And:
-
What exactly determines where these seam lines will initially be placed, where they will initially fall on your mesh object (unless you decide to adjust the UV's on your own)?
Thanks, ras
 0
0 -
That is such an excellent tutorial, Cerbera... I so appreciate your time in helping me out here! I see a good modeler needs to exert "lateral thinking", viz the Inner Extrude process on the sole...
0 -
That's absolutely it. Thanks, guys. I'm not sure I would've figured it out had you not explained it here.
0 -
Wow! thank you so very much, Cerbera, for your time and erudition in giving me this detailed tutorial. So appreciated!
1 -
Thanks, Cerbera! You are suggesting I do some things... which I've never done before in C4D modeling... So I'm going to have to use this opportunity to push my skills to the next level.
You write: I always start this sort of thing with a number of polygon bands going across the top of the foot at key points in the form, which I ultimately bridge together into the final shape.
I believe you are referring to using the Polygon Brush, correct? With 3D Snap active, yes? I've never modelled using this method... Never have used the Bridge Tool, either. Now's a good time for me to learn, hm?
I've never used Doodle Paint, either. Must try this. It's a sure bet your modeling skills far surpass my own, at this point.
I had made the upper shoe shape using Stitch-and-sew and Cloth's Dress-O-Matic! To sort of "suck" the polys onto the foot shape. As you say, my resulting topology was a mish-mash of triangles going everywhere, hence the lumpiness.
You've taught me a great new word: "chirality". Had to look it up. Very useful word. I had planned to create a mirror image shoe which should "fit" my figure's right foot. Thank you so much for your advice here, much appreciated.
0 -
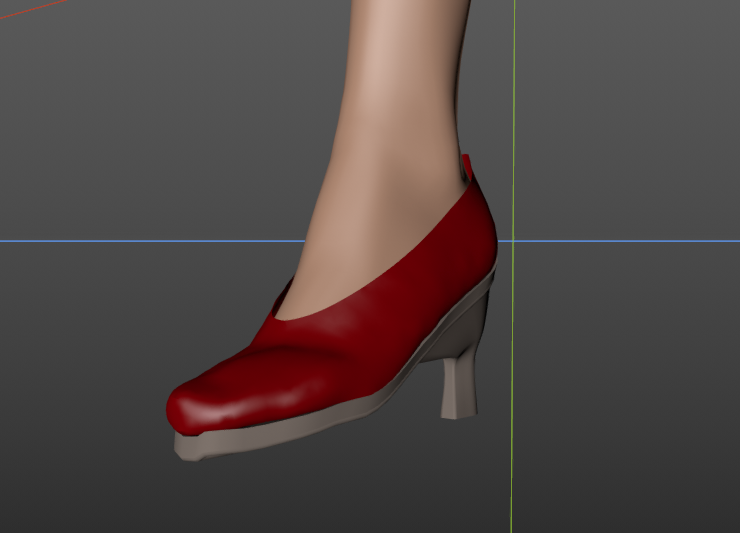
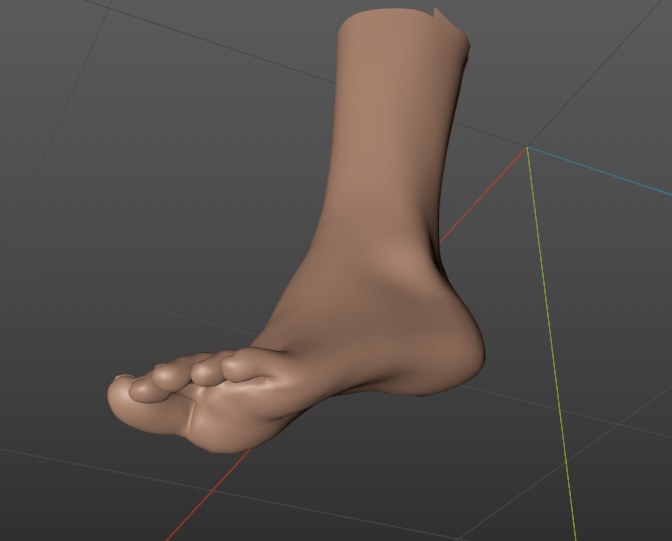
Hey guys,
I am trying to model a pair of shoes for a female Daz3D Victoria character. Here are some screencaps.
As you can see, I've got the general idea more-or-less okay, but it is by no means "beautiful", elegant or realistic. Still looks quite rough and clunky, I think.
How would YOU model a pair of women's pumps like this, assuming they need to "fit" the foot of a pre-existing character?
Perhaps I should've placed this query under "Organic modeling", because as you can see, there is not a flat, predictable or regular shape here at all... everything in a shoe must be organic and must be curved appropriately.
Realistic shoes just might be the most difficult real-world object I've ever had to model. Do I need to "cheat" a little and lop off the base of her feet? Your thoughts and ideas welcome!
Thanks, ras

 0
0 -
Hey guys,
Focusing on creating Hair in C4D. Last night I authored this short, lo-res tester video of an animated humanoid figure as it waltzes across the floor. Specifically I wanted to see how Hair Dynamics functions when made with Vertex Map tags influencing various parameters of the "hairdo". ie., could I make the hair dishevel a little bit with the figure's motion, while still retaining its basic overall shape?
Best, ras1 -
I see. Thanks, Cerbera!
0 -
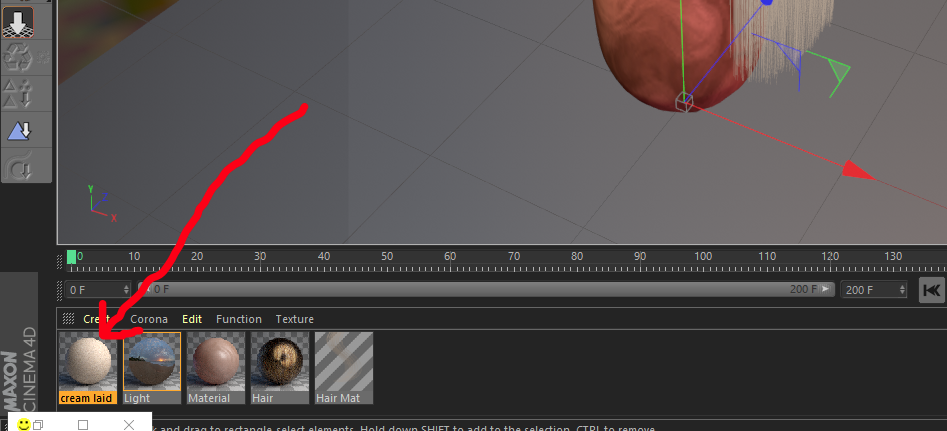
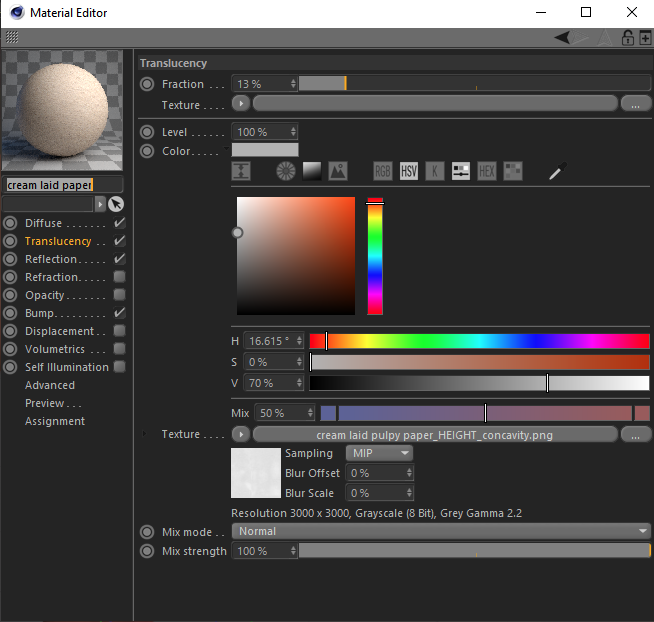
Hey guys,
A real dumb n00B question here, please forgive.
It's like this: I've just created a single Material that took some work to design. "Cream Laid Paper". I want to save just that one single Material to my hard drive, as part of a library I'm creating.
It happens that this Material is a Corona Material, but that shouldn't matter, hm?
How do I save/export just this one single material? (ie., as a shader, including all its bitmaps.) It should be obvious, but to me, it isn't. I'm looking for a menu dialogue that simply says "Save Material" or the like, but it's not there. Or am I thinking about this in the wrong way?
Thanks, ras
 0
0 -
Wow... thank you, KBAR! Downloading your plugin as we speak.
0 -
I'm curious... Can I make guide marks... just quick 'n' dirty marks for my own creative reference... on the surface of a Geometry Polygon Object without going into the full rigmarole of setting up UV and UVPaint? ie., make marks not intended to be seen upon a Render...
I want to indicate where on a geometry object I want to move and re-root a Hair object. Or maybe you know of a better way to achieve what I'm seeking to do.
Thanks, ras0 -
-
31 minutes ago, bezo said:
Can you post illustrator file?
Here is the Illustrator file.
0 -
Hey gang,
Can any of you solve this problem regarding the extrusion of splines?
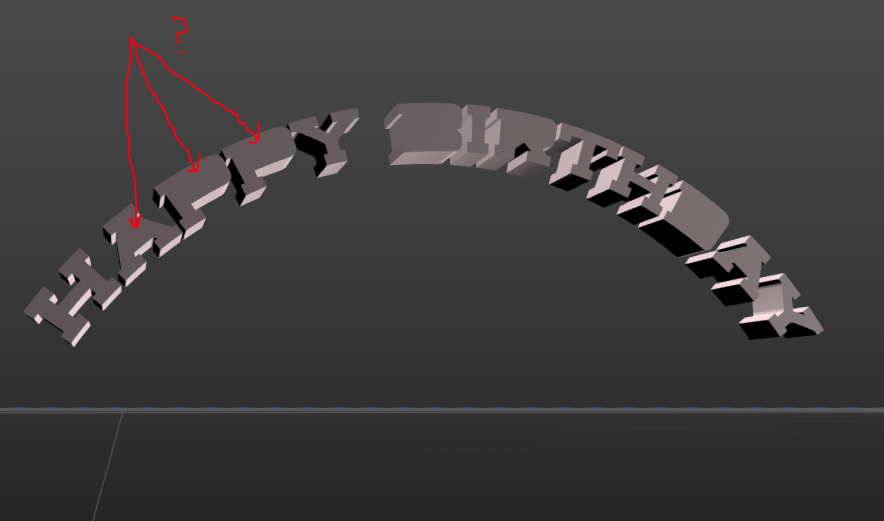
It's simple: I have imported these "Happy Birthday" 2D splines from Adobe Illustrator, and am trying to extrude them in C4D.
Upon extrusion, the "eyes" and "holes" of the letterforms are not representing correctly; they are "plugged up", you might say.
This is a dead-simple fontface, blocky, with the barest minimum of points... But somehow C4D is not "reading" the inner points correctly.
Is there a solution for this, either within Illustrator or within C4D? I tried reversing the path direction of those inner splines, but still am getting the same disappointing result. I also tried doubling the amount of points along those splines within Illustrator... No dice, same outcome.
You might ask: Why am I importing spline text from Illustrator instead of using C4D's native Text/Spline feature? Because I have bazillions of fonts on my computer, and C4D totally chokes and freezes when I merely try to change font families within C4D. Illustrator, on the other hand, can handle all my many fontfaces very easily (as can Photoshop).
Thanks in advance, ras
 0
0 -
JED, you nailed it. Thank you so much!
0 -
On 3/7/2021 at 7:28 AM, 3D-Pangel said:
May I ask why you need that shape. If you need it explain something in the real world then you need to Google "damped harmonic oscillator equation". Now what you will find are pages and pages of text talking about the physics and energy dissipation of a harmonic oscillation being enacted upon by an outside force such that over time its energy is completely dissipated. There is very little on just the math of the shape without going into the physics behind it but this page is probably the most gentle in providing both videos and text on the subject that I could find.
Personally, I would go with Cerbera's formula unless you need it actually model some real world phenomena.
Dave
Hey, Dave--
My purpose in this instance is not scientific, and thus does not need to reflect some natural physical behavior... I just wanted to extrude that spline to make curtains... and wanted the ripples to have that receding effect. Thank you for your erudition, though!
Best, ras0


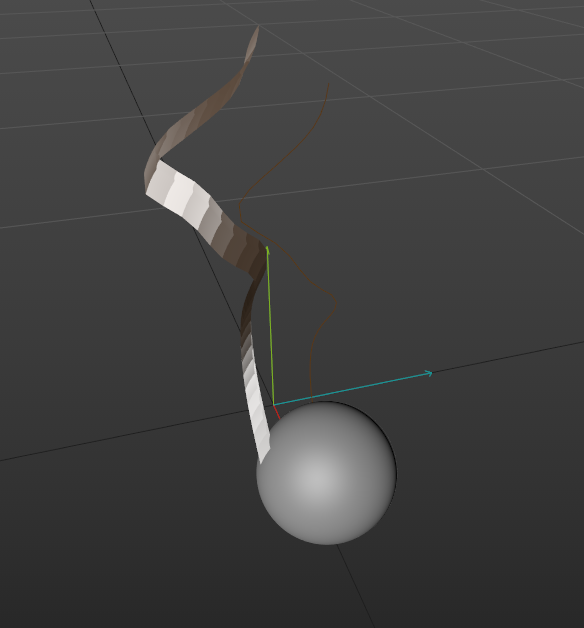
Spline-to-Hair Guide always disappoints...
in Miscellaneous - Do Not Post Here
Posted
Am I the only one never thrilled with the process of converting a spline into a hair guide?
Results are very hard to predict, because:
In short, the Spline to Guide process seems to create more problems than it solves, and never gives me usable results. Now I can't think of any situation in which I'd employ it at all.
Your thoughts?