Leaderboard


Popular Content
Showing content with the highest reputation since 06/30/2025 in all areas
-
Wetmaps: I created a vertex map in field mode on the dinosaur and put the liquid mesher (with a bigger voxel size so it renders faster) into the field list. In the field settings, the mesher was set to volume, and I put a decay field on top with 100% so it stays wet where it has been touched by the mesher. I rendered the vertex map just as black/white mask, so I could use it in comp to darken the original render. Additionally, I rendered a seperate, very reflective pass of the dinosaur, that I added on top in comp, again using the wetmap as mask. trex_water_v007_Wetmap.mp4 I then comped everything together in Nuke. I tried to make a smooth transition between the simulated area around the dinosaur, and the rest of the lake, but that was a bit of a challenge and didn't work out to my full satisfaction...it's still noticeable that the simulation doesn't spread out to the rest of the lake. Some final thoughts: AFAIK, our liquids solver is an SPH solver, which is generally designed for small-scale fluids. FLIP would probably be better suited for fluids of that scale. I find it even more impressive that the new solver is capable of pulling this off. It's also very speedy and very stable. Fully art-directable as it works with all the forces, all other simulation types and all the particle modifiers. I enjoyed that little project.4 points
-
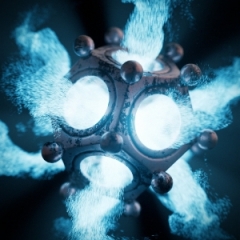
Here's a little project I made while I was betatesting the new liquids. trex_water_v006_high.mp44 points
-
Here are some insights from that little project: Easy things first. I reused the animation from my T. rex museum breakout: The environment is an HDRI from the asset browser. The lake (or river) is just a reflective plane with animated noise, and a gradient in the opacity channel to fade it softly into the backplate HDRI. The trickier part was the simulation, naturally. I wanted to simulate only the top layer of water, and I needed to figure out a way to only simulate particles in the area around the dinosaur. A whole lake would have been way too many particles of course. At first I tried to simulate it only in a "pool" that was a bit bigger than the T. rex, using the liquid fill emitter. It worked, but I had visible splashes at the border of the pool - unfortunate if you want the transition between simulation and the rest of the lake as seamless as possible. Instead of walls, I then gave the pool a slightly rising floor towards the edges. That helped mitigating the splashes at the border. However, I still had the problem that the liquid spreaded out pretty fast and drifted away from the dinosaur, where I actually wanted it to be. The beauty of the new liquids is that they work so seamlessly with the rest of the particles system: I could just use an attractor force in the center of the dinosaur. With the right settings, it helped keeping the particles near the T. rex, while still allowing it to act like a liquid. Here's the cached particles with the collider geo: trex_water_v007_Viewport.mp4 The sim contains 3.7 million particles. I used the liquid fill emitter with a radius of 0,7 cm. Sim time was IMHO very reasonable on my RTX 4090, around 20 mins for 150 frames. I would have liked to simulate even more particles, but when I lowered the radius to 0,6 cm (= 6 million particles), I didn't even see the first frame after waiting for several minutes, so I quit that. The cache is 27 GB. I only cached velocity, color and radius, which helped to reduce the size. I then used the liquid mesher with pretty much the default settings, but smaller influence scale, a lot more smoothing and the droplet size set to 10% - that really helps getting rid of those huge blobs that often appear. Here's a clay render, liquid mesh only: trex_water_v007_Clay.mp4 The particle color is mapped to the velocity, which was very handy to fake whitewater. I just remapped the particle color with a ramp to diffuse and reflection strength. The faster the particles, the brighter they are. I rendered them as a separate pass and added it on top in comp. Those particles render crazy fast! A few seconds per frame for 3,7 million particles with motion blur... that was a real joy. trex_water_v007_Whitewater.mp43 points
-
So in Blender there is this very handy modifier called "Data Transfer" that makes it possible to dynamically transfer normals between different meshes. What would you need this for? Well, for example something like this: Meshes before transfer Meshes after transfer Note that these are EXACTLY the same meshes as before. It is not connected to the main body in any way, it's just the normals that were transferred for the row of points that touches the main body. Now in THEORY this is possible in C4D as well, in multiple ways, but I can't get it quite to work. I also tried exporting the mesh from Blender and importing it again in C4D, but that somehow breaks the shading and it doesn't look nearly as good as in Blender. Technique 1: VAMP Create Normal Tag on source mesh Open VAMP Set up Source and Target mesh, tick "Normals" and set "Space" to "Global" Press "Transfer Maps" This transfers the normals as expected, but I CANNOT decide what is transferred and what isn't. It looks like crap when ALL normals are transferred: And even IF you got that to look right: The Normal Tag breaks completely when you add a subdivision surface, so the only option would be to convert the SDS first, then do the normal transfer. This is significantly harder due to the amount of polygons involved though and kind of defeats the purpose of the parametric workflow in C4D. In Blender I could just put the SDS above the Data Transfer Modifier in the stack. Technique 2: Normal Editor This kind of works, but not really. As far as I can tell I can just adjust the normals of everything I selected in ONE direction. This works for the outer ring that touches the thick part of the model, but not for the part in front that wraps around the cylinder. The thick part just points in one direction, while the cylinder points in different directions. To add to that you have to somehow get the transitions between the normals to look great, which I just could not get to look right. And again, this breaks when SDS is involved, as the normals from the Normal Tag are ignored by the SDS. Technique 3: Transfer Attributes This is I think the best solution. You can transfer the normals between meshes via the attribute transfer function that is relatively new I think. The problem here is that I cannot seem to "mask" the transfer to only some points. It seems like the fields are acting as a value for the normals instead of being a mask for the value transfer. This is what I mean: It works JUST like the VAMP Normals transfer, just that it's "parametric" which is exactly what I want. But I cannot seem to restrict the transfer to only certain parts of the mesh. Also, of course, this breaks again when an SDS is involved, but I could at least have my normal transfer parametric after converting the SDS that way. If somebody could figure out how that works, if it's possible at all, that would be greatly appreciated 🙂 Stripped down Scene File is attached. Transfer.c4d1 point
-
Oh, I see, you would need essentially double constraint, that looks quite difficult. Are the nulls always on mesh surface? Essentially transforming any null or mesh itself should transform whole setup, right?1 point
-
Great work! Looks impressive considering the current state of the system.1 point
-
You will have to transform all targets as well. With two axes it is not problematic, you can use constrains multi_axis.c4d1 point
-
I'm sure Autodesk will get no bad press at all for integrating AI character animation tools in their software that is known for having amazing character animation tools. This will surely go over well with the animators using this software. lol, I knew it:1 point
-
Won't be of use, since this is a limitation that depends on the network setup. A file that doesn't work for me will work for you if you never have this problem. Years ago in another job we worked on network storage with C4D and it worked as well. Here, it doesn't, and according to support this is perfectly normal. I have never used this feature, but I'll have a look. I fear that I will not be able to use this due to IT guidelines etc. though 😛 Too much data, not to mention I have a library that needs to be synced all the time as well. Cloud storage is just not feasible with the amount of data and the internet speeds here.1 point
-
You could store active projects in a Onedrive-Account and sync that seamlessly. Much better working speed with local files on SSD vs NAS storage or VPN. Library could stay on NAS.1 point
-
chuck me a simple scene which has this problem and ill see if theres anything obvious. Just a cube with a texture which complains about it missing. Don't use 'save project', just copy the file as-is so no file paths get changed. Why not turn on windows/mac backups? both OS's have built in tools where you can roll back a file to any previous version from weeks or months ago. In fact use the network drive as the backup location that way you get local performance and the backups are all RAIDed up. Nothing stops you from having your external drive backed up. Its just a drive like any other. Set it to backup to your local machine or the NAS when connected, it can silently do this in the background. Here I run most projects from an external 4tb SSD, that drive backs up to a local 18tb hdd whilst connected. On top of this there's the backups via proliferation; ie. theres a copy of most stuff on the render master, theres a copy on the Raided NAS when projects are finished. Even without my own official backup, the data gets copied around so much that its always in multiple places.1 point
-
Sorry to disagree again but it is the exact opposite. MD gives enormously precise physics control by having a seperate physics tab. Modeling and physics are precisely controlled. In the current new C4D way I am basically blind guessing how low my low poly cage needs to be. How would I know the mesh density of a certain fabric style? I am forced to guess around with multiple poly density cages until I get there somehow. 100 polys? 500? 2500? I am realizing you guys designed it for Mograph stuff in mind. I initially thought Cloth is for characters. Guess that’s where we differ.1 point
-
Ok! Then provide some samples in the asset browser, please. I think it's always a good idea to let users dissect examples or to give them a good starting point. Especially when parameters are sometimes somewhat unclear (like lower substeps make for a more bendy material)1 point