

Langley
-
Posts
339 -
Joined
-
Last visited
-
Days Won
1
Content Type
Profiles
Blogs
Forums
Gallery
Pipeline Tools
3D Wiki
Plugin List
Store
Downloads
Posts posted by Langley
-
-
How about the projection mode? Would that work better on odd shapes etc? My knowledge of this deformer is bad.
0 -
Just a quick one on this CBR. If your object is much more organic and random, would you in essence still have to do this for it to work correctly?
0 -
Cool thanks CBR. I never stop learning with this stuff and I would've never thought that the UVs would make any difference with this but it just goes to show you how wrong you can be. Thanks again and I'll give that a go.
0 -
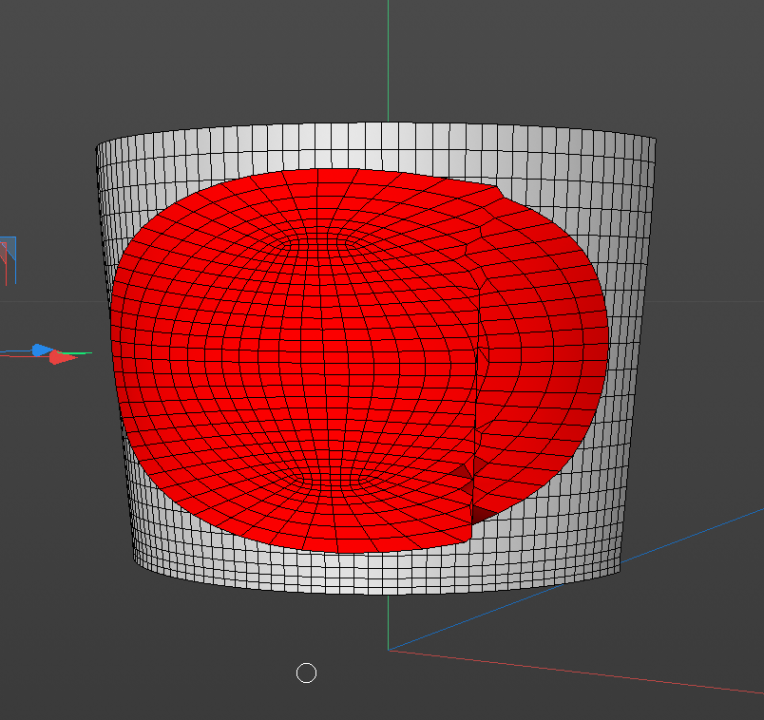
Thanks for your reply HP. Im not too bothered about the UVs at the stage as my only query is why the surface deformer does this? Originally I had a cutter guide that I used and extruded flat, then made editable and then applied using this method but that was a right mess so I remodelled the label aspect and then tried the deformer. I can worry about the UVs later which in all honesty shouldn't be a problem unless what you're saying here is that for the surface deformer to work my UVs need to be right? The surface deformer is just for objects isnt it? Can you see the screen shot ive attached?
0 -
I get a message asking me to register but i am already registered and paid up.
0 -
Hi all.
Ive never had much luck with the surface deformer and heres another example of why. I am trying to wrap an object (a label) around a bottle and the shrink deformer isnt the right one for this so have resorted to the. surface one. I just cant get round why it keeps clipping the edges when I try and move the object around the shape. Can somebody please show me where Im going wrong here?
Thanks in advance for any help.
 0
0 -
Thanks for that info Bezo. It does seem to do the trick if i want to render a static image. What I have found though is that when I keyframe the rotation under turbulence it kind of does some of other weird stuff and what i need to do is animate the rotation. Surely it should work or is it like ive said a bug with this effector? Are there any other ways apart from going down the road of using separate units to render and not use the effector?
0 -
Just to add to my own topic. It seems to work ok if I set the clones to iterate but does this crazy thing on grid. Ideally id like to use grid as i don't want to have lots and lots of cloners working separately. Must be way to make it work correctly?
0 -
Hi all
Im using a cloner with grid layout set and trying to animate the rotation, quite simple. Im using a random deformer to rotate the objects independently but am getting what can only be described as the texture splitting up (like shown in the screen shot). Just wondering how to stop this, anybody know? Ive never seen this before. Ive tried changing the mapping from cylindrical to UV but nothing seems to work so hopefully someone here can tell me if its just a bug?
Thanks all
Lang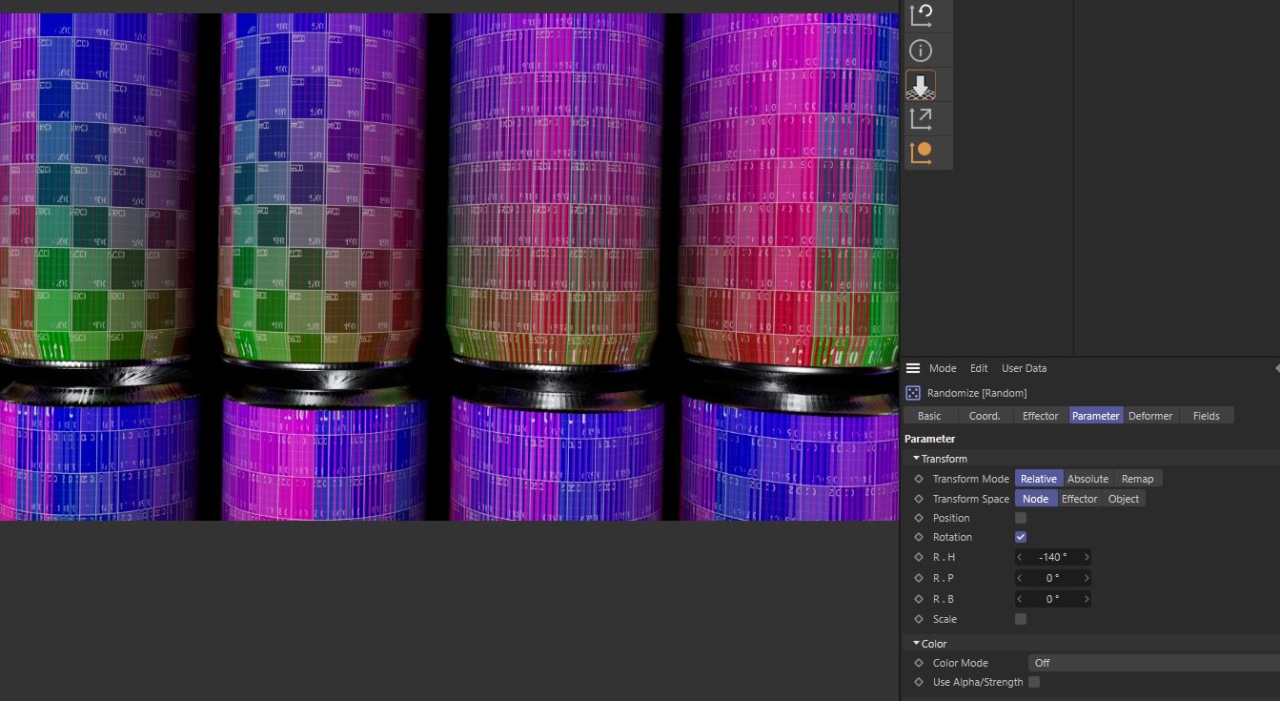 0
0 -
Hi all
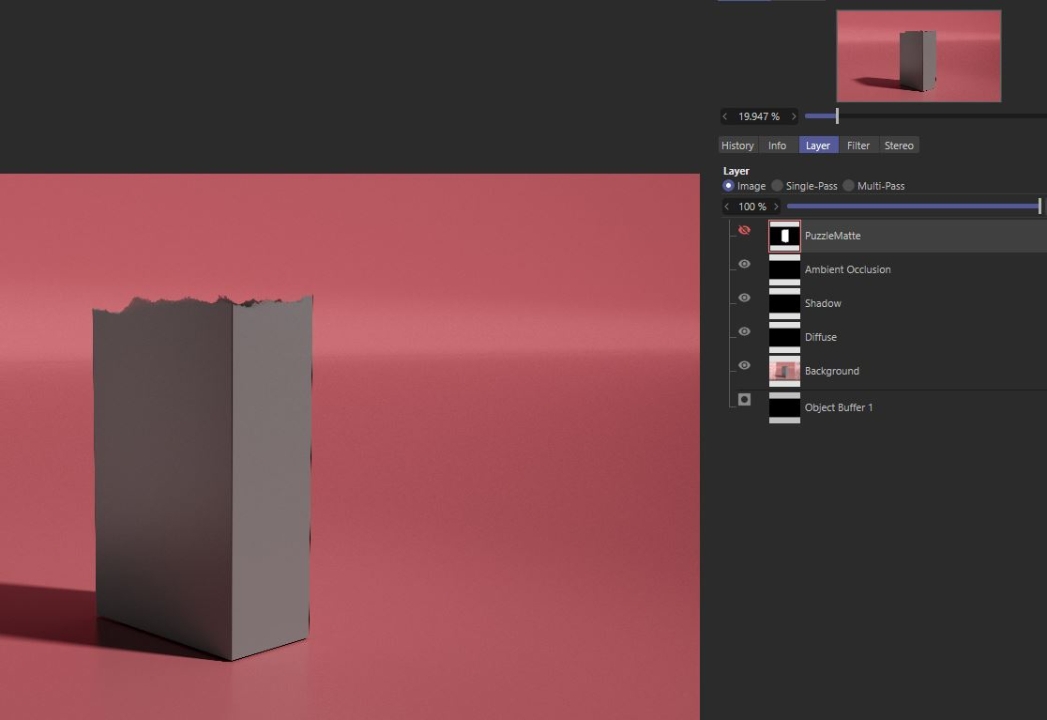
Ive been trying to find a way round this but am not not having much luck. I have a simple box that I need to be able to show where it has been torn from the top. I have a texture in place and all looks fine but when I render using a puzzlematte for the mask its using more or less the whole shape. I have it set to see the object ID and I thought this worked for me before but for this no.
Basic file supplied. Hope someone can help on this.
Cheers

 0
0 -
Thanks Mike A. I'll give it a go again but im pretty sure ive been down this road before. It seems to take some real extra effort to make it work correctly in RS. With all other render engines that ive used ive never had these problems as they mostly share this common feature of using the same rgb values for bumps etc, very frustrating. I love RS and its features but this really needs addressing by their developers for sure. Thanks for your input though its appreciated.
0 -
Any ideas people?
Ive also had another chance to look at this today and found that by setting the grey value to 72.5% seems to help but once again goes against all the information ive found online for using RS displacement.
Ive found that RS is brilliant at some things and like octane great at giving you instant feedback and crisp textures but i hope the people who develop RS look into this at some stage as its just ridiculous that you cant setup and file with white, grey and black and expect it behave like a normal bump map should.0 -
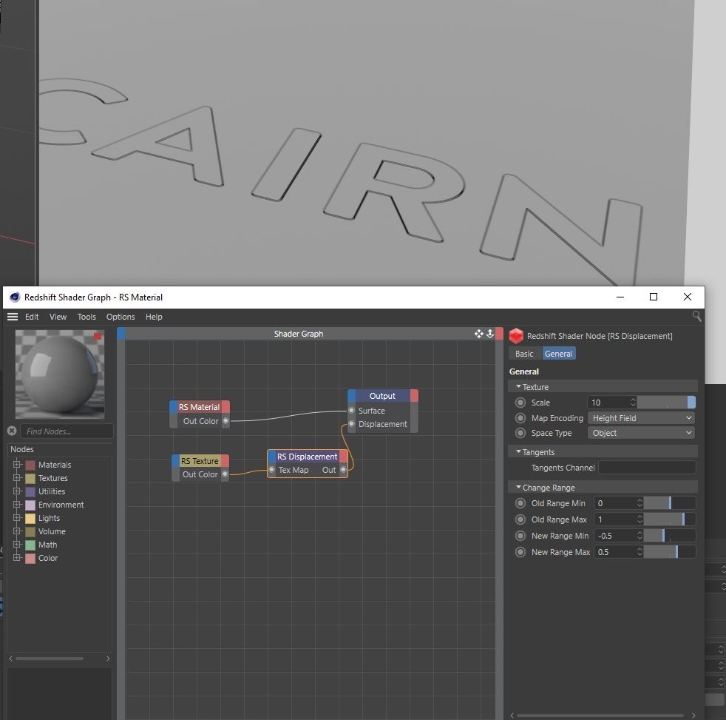
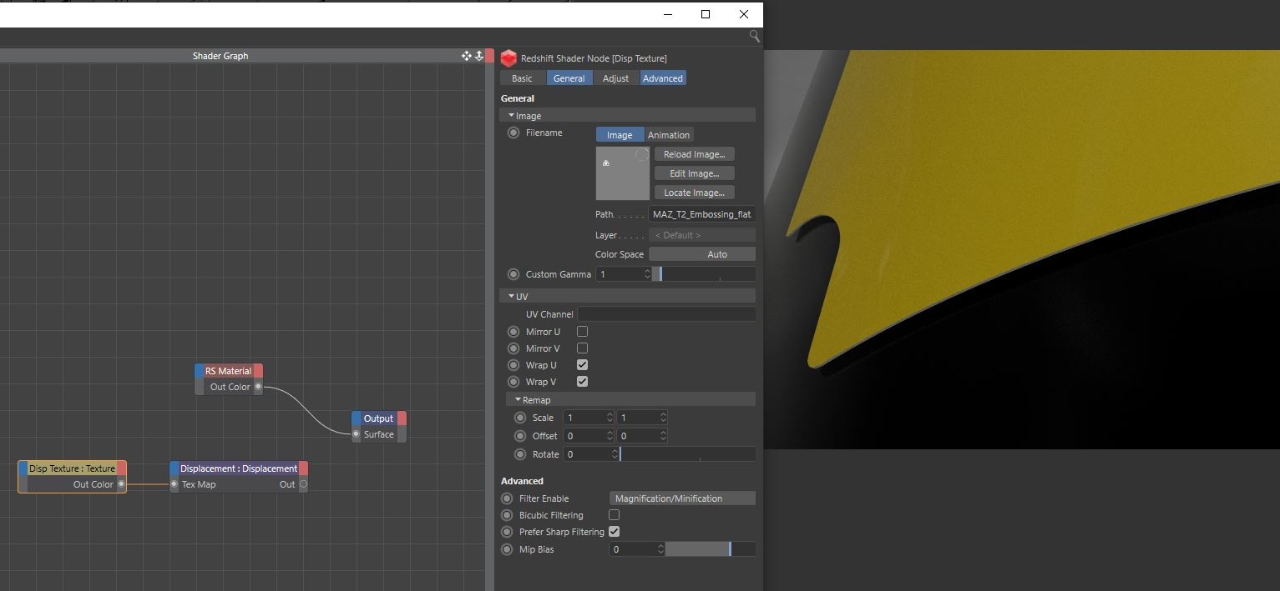
Hi all
Im trying to displace a very simple piece of text onto a plinth and im using redshift as the renderer. Ive been using it now for a little while and am getting used to its quirks compared to octane and physical but the one thing i have problem with every time is using the displacement feature.
I have a simple file here that i hope someone with much better knowledge than me can help with. I have a simple piece of text in rgb with 50% grey for no disp. but black for displacing down. Ive seen on other forums including this one that when using a mid grey that you have to set the range different so it knows that grey is for nothing to happen. Only problem is when I do this it just doesn't work so does anybody out there that knows RS well can you please help me out here before I lose my mind!!
Huge thanks in advance for this as im losing my hair rapidly trying to work this one out.
 0
0 -
Hi all
This is now further to my last issue with Redshifts displacement node/tag.
Hoping someone can tell me what is going on here with this as its driving me insane. Basically i have an image I need to use for displacing which is RGB and has equal 127 values for mid grey, black for downwards and white for upwards but this is what im getting. It looks like the displacement is having an effect around the edges or the tessellation/subdivision surface that when turned on is causing this to happen but because its 50% grey everywhere i don't need displacement there shouldn't be doing anything at all?
Thanks for any help in advance here.

 0
0 -
Thanks Mike A.
1 -
Yeah cheers Cerbera. I also use octane and prefer it when it comes to the simplicity of using bumps and displacements in this situ. That whole thing is done via the range setup where you put in you're supposed to put in a -.5 for black where 0 equals grey then+.5 would equal white but when i do this it still does all sorts of weird stuff. Its so annoying as should be so simple.
0 -
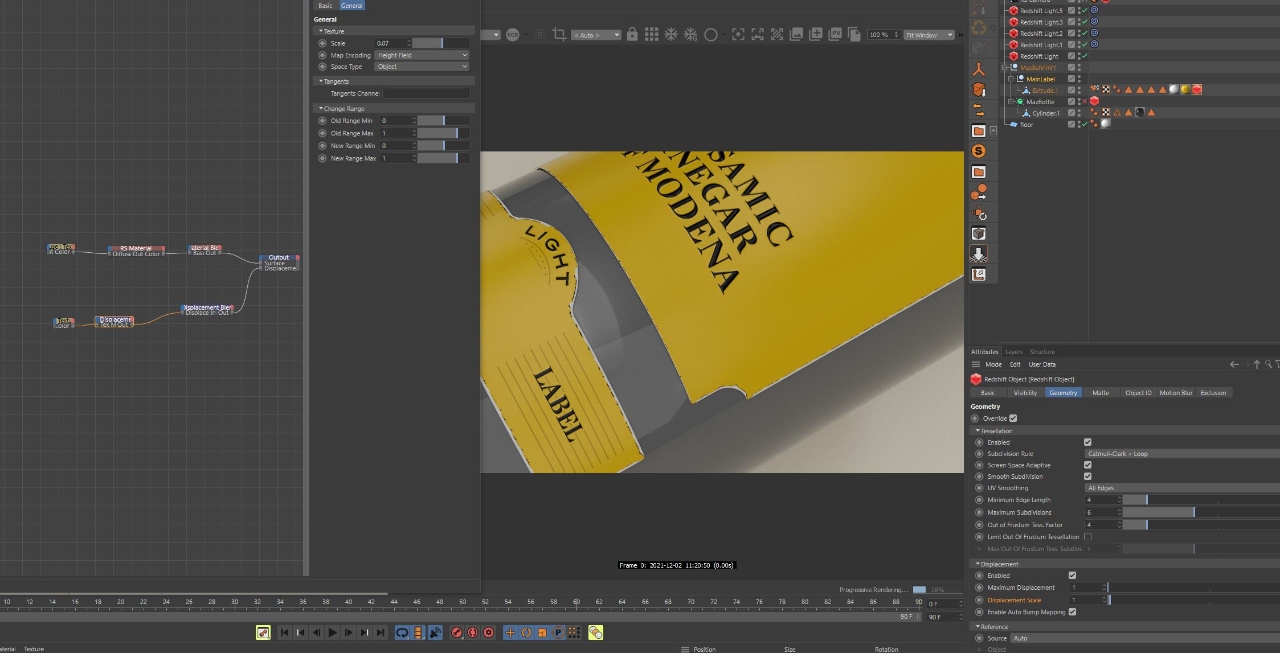
Hi all
I've got a bottle that I'm trying to displace certain things like the bottle crest base stipples etc and I'm using Redshift to setup and to hopefully render in. I've setup the displacement as 50% grey for no displacement and white for full disp, with no black being used to send disp downwards but when I apply this its moving the whole bottle outwards and going past my outer labels to cover them over. Ive always worked by the theory that using the black, white and grey is best for displacements to achieve up, down and nothing but in this instance its not working that way. I have checked online and by setting the values in the disp node to -1 it should know to see grey as nothing but it isnt. Is there something not quite right with how im setting this up? All or any advice would be highly welcome.
Thanks for any help

 0
0 -
Thanks Cerbera, super helpful as ever
 1
1 -
Oh dear I think I should know this by now but believe me ive always got round the problem by using other methods but on this occasion I want to try and see if ive just been doing it wrong all this time.
I need to project a spline of a label onto a bottle but because the label actually wraps around the bottle to some extent but but not the whole way when I use the project spline tool it tends to apply the part of the label thats facing the object directly rather than applying the spline around the shape. Am I doing something wrong with this method? Or is there a much simpler way to achieve this? Ive tried using all sorts of other settings but get no where.
Thanks for any guidance on this no doubt simple matter for some.
 0
0 -
Hi all
Just getting used to using Redshift at the moment and have a little problem I hope someone with greater knowledge than I can help with.
When I produce water droplets or condensation over a surface I seem to be getting what can only be described as a white halo effect where the material sits on the other surface. Ive used Octane and physical render up till now and know each has its particular settings that certain materials need to work correctly. HAs Redshift got something similar that im unaware of? Or is it a samples issue?
Any help will be hugely appreciated.
Lang
 0
0 -
Cheers Deck. You're absolutely right there, it would actually go further up the bottle and not where ive shown it but my query is the same. Thanks again.
0 -
Thanks Cerbera.
Strange really as I would've thought there would be a way round this other than having to warp, distort and scale in Illustrator or PS beforehand. Ive had to do plenty of this sort of thing and each time ive had to do just that which can be a real pain and time consuming. Just wondering if there is a 3rd party app that deals with this sort of thing?
I had tried the bend deformer and a few others like the surface deformer, shrink. wrap etc and some come very close but not close enough.0 -
Thanks MIKE A.
Yep seen that one too (brilliant btw) but what im trying to work out is whether i can take an existing cutter shape thats not your usual and deform it so that it wraps around the bottle correctly. What ive tried so far is using various deformer tool objects to get it right but cant make it work. What Athanasios shows is just how to get the UV for the shape, but what I need to do is the opposite, any other ideas anybody?
Cheers
0 -
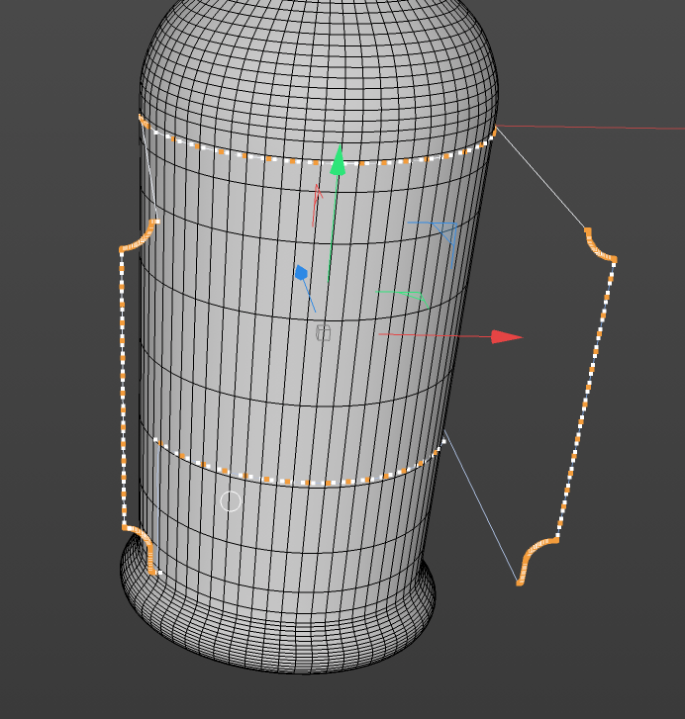
Hi all
This is something Ive been looking at for an age and usually end up taking the artwork and straightening up in photoshop or similar so i can apply it easily. What Im trying to do is take a cutter guide that is curved and apply to a bottle neck but when I do this with the cutter as it is shown in the screen shot it just bends round so that the sides are then slanted. Does anybody know of a way to apply this type of shape to another so that I dont have to fiddle with the cutter and artwork shape? Ive also looked at deformers to deal with it but havent much luck so not sure if this right way to go.
All help appreciated.
Lang
 0
0


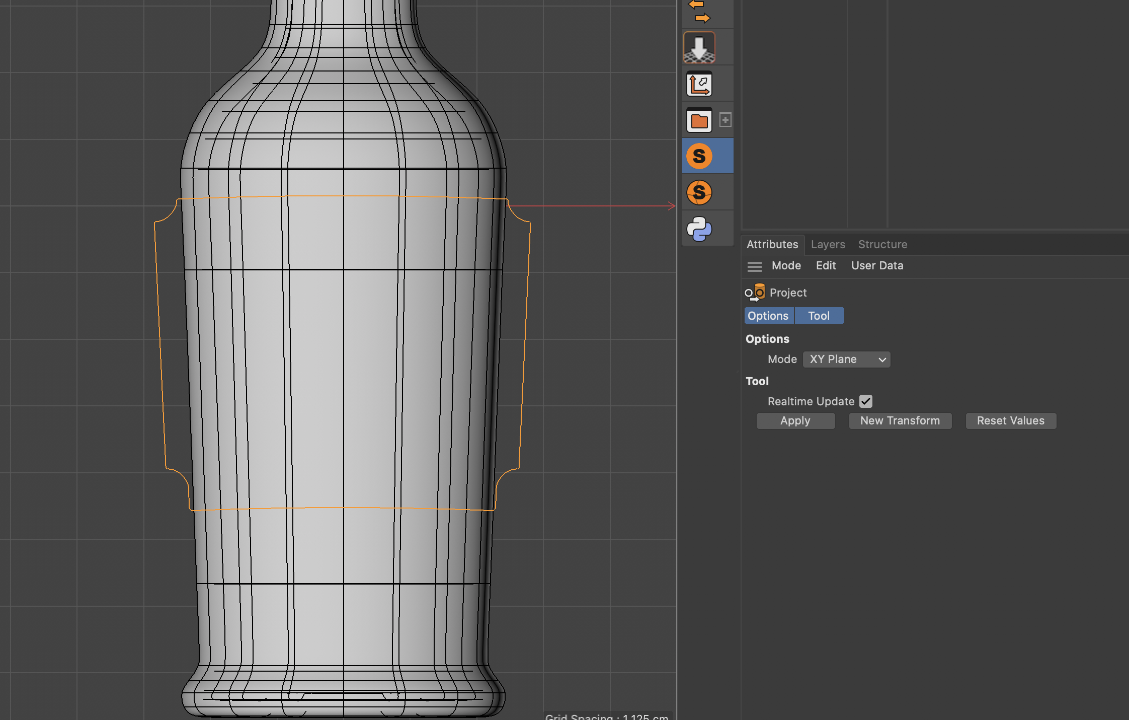
UV Problem
in Cinema 4D
Posted
HI all
Can anyone help me to get this UV right as im a complete novice with UVs of this sort, see attached file and screen shot.
Basically im trying to have the UV's on the shoulder area of this bottle top transition smoothly down to the bottom edge and not distort. Is this something that can be done with C4D UV's?
Thanks in advance to any help on this one.
Lang
bottle _top_uv.c4d