Leaderboard


Popular Content
Showing content with the highest reputation on 09/11/2017 in all areas
-
Yeah, nice idea. Btw, you posted this like 5 times lol1 point
-
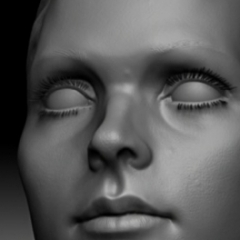
Fantastic work, that's really a great likeliness model. It captures the personality of the character with great accuracy. I will disagree with most here though, I think the hair is the weakest part of the rendition. They look too soft to me, especially on the beard, as if the hair strands are too thin and too many. In the actual character they look more scruffy and rigid I think (open in new window to see full resolution): That isn't to say that there hasn't been an amazing job already. Thanks for the breakdown as well!1 point
-
Update: I upped the settings, and got a even cleaner render, though I need to refine the settings as 12hrs at this level is not exceptable times, where as the images above took 1hr 42min. This is a colder tone. Warmer tone. Here is some info on my Process. Modeling/hair: I use simple poly by ply modeling for precise control. I wont try to add detail to areas like nose and ears until I sub divide the mesh once which becomes my final base mesh. Hair wise it was 9 layers for best control. I use maps for density, and thickness as well as the clumping within the hair material. Watch these videos on clumping and thickness maps. Sculpting: I store the original state of the base mesh within Zbrush using a feature called store morph target. I then sub devide and sculpt base secondary level forms which does not include high skin details. I then on another layer sculpt high details. Painting: In Zbrush I project paint a photo, this will not be what I use in the render but I use it as a color pallet in which I use the colour picker to hand paint over the model. By the time Im finished there will be no photo projection left other than the odd patch here and here. The reason why I dont use photo projection for my final is because I want the skin sculpting pores to match the diffuse colour, and being that I dont use the photo projection to extract skin details from, and use XYZ textures for displacment detail I do the following. 1: Project, then finish hand painting model. 2: Use skin detail layer to mask by cavity, inverse mask and fill in with darker tone. This then makes the diffuse colour complement the real skin details. Post work: I render a number of layers keeping the 3 lights that produce specular as their own pass. This lets me control spec from each light, and paint more or less spec on these layers. . Being as the rim light highlights the hair edges, I add a colour filter to this to push a deeper colour into it.1 point