-
Posts
743 -
Joined
-
Last visited
Content Type
Profiles
Blogs
Forums
Gallery
Pipeline Tools
3D Wiki
Plugin List
Store
Downloads
Videos
Everything posted by grain
-
Nice. I totally agree - travel broadens the mind and keeps your mind fresh! I'm about to head to japan for the first time.. very excited!
-
I'm not an expert in either Unity or Unreal but have started to muck about with both packages whilst working on some VR projects. IMO Unity is easier to get into, it's a bit simpler code wise and plays nicely with C4D assets. There are fantastic step by step tutorials on youtube and there's a big asset store which enables you to buy packs for all sorts of projects. I've got a pack that handles 3d pointclouds and it looks really cool when you 3d scan something in and then hook it up to a VR camera. Unreal is slightly more complex at a first glance but graphically it's way more powerful. They've got slightly different licensing requirements so if you're doing it professionally have a look at their terms and conditions to see what suits you better. Also, you can download free versions to play with before you spend any money so definitely have a go at both to see what you prefer.
-
AE Raytracer eh? Nice use of the AE workflow. Not sure if Lite supports GI (I think it does?) but rendering metallic specular materials like this doesn't require GI really. I think you've done a good job. There's a couple of things about it which you could think about - these are all just suggestions to help make it more like a TV sequence you could see on air (full disclosure I've worked on quite a few title sequences including some films and tv shows so I'm not just randomly firing internet words at you. Well I sort of am.) First is the BG texture not moving while the camera rockets around is kind of distracting. I'd pick whether you're creating a 3d environment or a 2d texture layer but at the moment it's jarring the difference between FG and BG. Second thing you could try is slowing down the pace of it, building some tension into the edit. Do you need to follow the one tip? Maybe try starting it slower, have multiple shots. Play with compositions, nice framing, scale. Third thing - ALTRUISTIC. Interesting title, how does your animation relate to the name of the show? I could possibly see there's a link between the path moving and turning (making choices) before ending up at a destination.. but that's me post-rationalising it. Possibly think about how your animations reflects a message relating to the word / show. Final thing - the font combined with the brushed metal look looks a bit like terminator or some bad-ass action movie. This might be the right choice, I don't know what the show is about, but at the moment it jars with the word Altruistic to me. BUT it looks nice, so good job there. Please take all this with a grain of salt, just trying to help you improve and not be a negative internet person.
-
To me that's a crazy low amount for the work required. If they went with the insanely cheap option then it's likely they'll get a dodgy result. Plus in my experience the clients who have the lowest budgets are the most annoying to work with as they don't place any value on what you actually do, so therefore you get infinite changes ("This will only take an hour or two to do, right?"). I reckon you dodged a bullet there.
-
Hah ONE TRIANGLE that's it vector, on your bike mate..! Just kidding - that looks awesome. How long did it take you to build, and how'd you do the tyres? There must be some cool technique for that.
-
Oh right well in that instance it will certainly help, particularly if you're basing your car scenes in a metro environment.
-
Do you mean for modelling or texturing? The DEM map data that the plugin allows you to download is not super high resolution, by default the highest res it gives you is 30m per pixel. So when you're at street level the ground is blotchy and low resolution. Modelling wise, it's more useful as a guide for street and buildings in metro areas, but again, it's not super high resolution or detailed. Think the level of detail you get in Google Earth, it's similar to that, however the buildings are better in Google Earth.
-
Once you've cached the fluid sim and baked the mesh, it's pretty quick!
-
Cinema 4D HUGE filesize please help
grain replied to woodstar's topic in Miscellaneous - Do Not Post Here
Alembic is a cross-app standard file format for exporting animated elements. It's a more modern, robust FBX type format that allows you to export particles, splines, etc as well as normal polygon animation. Xrefs are for C4D only and can be really useful, but they require a lot of discipline across the team to use them properly. Also they used to be a lot more basic (but easy to use) and then around v15 or 16 they updated the xRef tech and now it's a lot more granular.. and I never use it now as a result. You can quite easily accidentally import the original animation into your file which negates the whole point of them. Alembics are fast and clean so they're better to work with IMO, except I think materials don't work with them. -

Cinema 4D HUGE filesize please help
grain replied to woodstar's topic in Miscellaneous - Do Not Post Here
Export your animated elements to an alembic and then import them into the C4D file. Baked stuff is always huge but if you export it to an alembic it will be faster to work with in C4D. Plus if your scene autosaves etc it won't resave the whole alembic, just the C4D pointing to it. -

Cinema 4D HUGE filesize please help
grain replied to woodstar's topic in Miscellaneous - Do Not Post Here
The polygons, points, etc aren't crazy. Have you got any mograph cache tags, baked objects, anything with a "cache" type option? 9gb is bonkers for a file unless you've got say a cloner with 1000 objects all baked for 2 minutes or something like that. -
Looks like an awesome chip. I think it has fewer PCIe lanes than equivalent Intel chips, but not sure that'll be an issue. I am seriously considering building a system based on this tech as well. And, just in time, the geforce 1080ti has arrived. Good times. Also, the AMD Naples processors look like they'll be interesting as well. Sort of like the xeon version of Ryzen, 32 cores (!).
-
Really cool stuff. Dare you to record a screencap while you sculpt your next one! Always love watching those things..
-
I'm using redshift on a job for the first time and I love it. I've got cycles as well, and I usually use Octane. For anything glassy / specular / refractive then redshift wins in a huge way, it's just so fast. Cycles is the winner for anything xparticles related (and the volume shading is awesome) but it's a bit slow I find. Octane is my preference purely for the look, I think it makes the nicest pics straight out of the renderer. A simple light and a white material and octane makes you look like a genius. However as soon as you've got specular materials, anything with hotspots.. octane takes ages to render. Sigor - I know what you mean about nodal materials, or workflow in general. I could never get that comfortable using Nuke as a compositor for example, I much preferred AE and layers. Redshift has a nodal interface that looks like Xpresso (if that appeals to you), cycles and Octane have their own versions. Cycles (to me) is the most complicated but also possibly the deepest. Redshift offers a lot of control over optimisation, and it's a bit like Vray in that if you know what number to make 0.5 instead of 2 suddenly your render will be way quicker.. Personally I hate having to swim through heaps of settings to make a render work. I love octane because it's super simple - but that can work to it's detriment as well when you want to speed things up. Anyway, nice work on these tests Nerv! Keep em up..
-
This topic seems to come up every now and then..
-
Hah that is disgusting and awesome.
-
https://jobs.motionographer.com/
-
I think your work is really nice, particularly your texturing and lighting. A couple of the shots look super great, the little weird wheely plastic thing rotating into position (bobo cone wtf) and the crazy adaptive screwdriver thing at the end. For some constructive criticism I would actually suggest working on your compositing a bit, at the moment everything is super clean - veering into mega CG territory. Also texture wise, I think you've done a great job and it's tricky with product demonstrations because they always want things to look nice but to add realism you've gotta get a bit more imperfections in there. Take the plastic cereal eating machine at 26 seconds, the top part is high gloss but it could do with just a little bit of detail in the specular layers to give it a more tactile feel. Try mixing multiple glossy textures together with slightly scratched up spec maps, different index of refractions etc. Also I'm not sure if you use them or not but substance designer is great for texturing objects (as is Mari or 3d coat if you want to go crazy). But yes, overall - one year of work! Wow, keep it up.
-

New 3D Software to be debuted at Superbowl LI (51)
grain replied to 3D-Pangel's topic in Discussions
So were there any cool uses of the FreeD tech? I've googled, can't find any! -
Get the apprentice / indie version and do the entagma tutorials, it's so much fun!
-

New 3D Software to be debuted at Superbowl LI (51)
grain replied to 3D-Pangel's topic in Discussions
Absolutely, it's going to be awesome to see how far the tech has come along. I wish I knew anything about NFL so I could appreciate the game more! And it wasn't starting at 11.30pm london time.. :/ -

New 3D Software to be debuted at Superbowl LI (51)
grain replied to 3D-Pangel's topic in Discussions
This is pretty cool tech - you can see a demo of how it looks here: https://www.theguardian.com/technology/video/2013/aug/13/freed-matrix-3d-replay-technology-video -
Usually when you freelance you're in house, on their computers, under their supervision. They (should) pay for the software, incur that cost as part of their standard business costs. If you're working remote (as it sounds like you are) then you're justified in charging for your own software and hardware. You bought it, you need it to do the job, it's a cost you can pass on. However if a client is booking you and they know you're based off site you probably don't have to say "+ kit" on the invoice, just put it in your rate. I mentioned that because sometimes I've been asked to work in house but to bring my own stuff, or they don't have a 3d license etc. How you invoice is up to you and the client coming to an agreement. Usually it's just a day rate, at least in the UK. Sometimes a client will try to arrange a set fee, most of the time I don't go for this as in my experience it won't stop them changing it but they'll think they only have to pay that one amount. The fee only works if you have a good relationship with the client and / or are good at standing your ground as far as changes go. -- Re rendering, yeah the mac pro is not very lucky when it comes to gpu rendering options. The old cheese grater ones are actually more versatile than the newer trash cans cause you can install Nvidia cards in them, but man they need to update that range. The CPUs on them are decent at least, so standard renderer and vray work pretty well. I'd go PC if I were you ;) Unleash the mac vs pc debate again! ha.
-
If you're freelance, think of your day rate as the cost to a client of you being on the keyboard hitting the buttons to make their stuff. If you're using your own kit, you should charge extra for that. If you need to use a render farm, you should inform them of the cost and then put it on the invoice. If you're taking on a job on an agreed budget as a company does (ie, make me this animation for 10k or something) then you would factor rendering into your quote and not charge separately for it. Unless something unexpected happens like the CEO sees the signed off animation right at the end and then changes everything requiring a complete re-render the night before, then you'd charge additional for the render farm. Personally I try to use as many tricks as possible to reduce render time, to avoid using render farms. I have found switching to GPU rendering has greatly helped in this regard, allowing me to achieve results < 2min per frame where previously I might be looking at 5-10 mins using the standard cinema renderer or Vray with GI. Also if you're rendering a lot of layers for multi-pass compositing the file transfer to and from the farm can be pretty heavy.
-
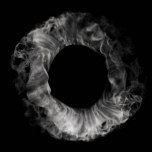
Turbulence 4D all the way. Cool image by the way, I love that effect. Have you seen the paintings done in this style on glass? I digress. A cheeky way you could fake this effect would be to get footage of an explosion (with alpha), and freeze frame say the first 10 frames (up until the mid point of the explosion). Then arrange those frames in Z space. It wouldn't look quite right but kind of similar, instead more of a time-slice look.

