


BridgeThoseEdges
-
Posts
11 -
Joined
-
Last visited
BridgeThoseEdges's Achievements
")


-
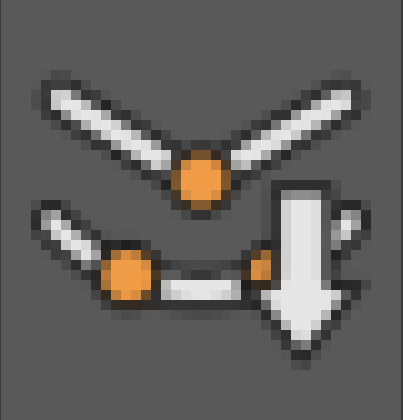
@prowl Ok, i opened and modified the txt file by following your instructions. Guess what... it works like a charm!!! I'm sorry but the custom icon i made was for the 'select material tags/objects' command, not for the 'select children'. I also added the 'Set Parent' & 'Unparent' that mentioned above as well as the 'Unfold Selected' and 'Fold Selected' commands. I'm sorry for the poor resolution of the screenshots, they look really sharp in reality. Ok, now i'll go for the rest of them. Thanks again prowl!!!
-
Thank you so much for the help Prowl!!! I 'll open the txt file and try to understand how it works. Yes, i'll go for custom designed icons that follow the minimal approach and color code of the new UI. The 'WANTED' icon was just for testing, but the 'select children' icon follows the same principles and colors as the default icons. Yes, i export them as separate PNGs from Illustrator and then i add their alpha channel to the alpha channel of the main icon sheet, in order to work properly. I haven't noticed that with any plugins yet, maybe because the ones we use at the office have their own icons. Thanks again for any help, i appreciate it!!!
-
No, i haven't touched the .txt file at all. Should i or should i leave it as is? I mean, do i have to modify it as well in order for the custom icons to be assigned properly? If you guide me, i'll continue working on the custom icons.
-
I tried myself to modify the icons sheet because we use a custom layout at the office and we need the icons for some specific commands as now we get only empty buttons. The only way to 'fix' this is to choose the option 'Show Text' as mentioned above in order to see what button you press each time, which is kinda sad cause they did a good job to make the new UI more modern and minimal. Another way to fix this is to make a custom script which calls the command and there you can add a custom icon for the button but... imagine having more than 20 scripts for commands that are built-in, it's funny. As you can see from the Photoshop screenshots, there is a slot on the icons sheet but it corresponds to multiple commands as it's shown in the Cinema 4D screenshot. And added another screenshot with one of the custom designed icons i made (e.g Select Children command). Again i had the same problem as you can see in the screenshot, it works for the specific command but it's been assigned to any other command that corresponds to that specific slot on the icons sheet. I was eager to make some custom icons and share it with the community but it's impossible to work, so our only hope is the devs team to fix this at some point.
-
 @dast Oh god, i never saw that documentation... I was so excited cause i found the plugin after a long time. Anyway, the fault was on my end, nothing wrong with the plugin. I just thought that it would work like other plugins by placing it at the installation folder instead of the preferences one... Then i copied it to the preferences and just forgot to remove it from the installation one... Yeah i know, but like i said i was so excited Thanks again dast, it's an amazing plugin!!! @bezoAnd of course, thank you for the help, without you i would still try to figure out what's wrong
 -
Yes, removing it from the plugins in installation folder fixed the problem. Thank you both guys!!!
-
 @noseman Thank you Thanasis for all the nice plugin you provide to the community, or should i say ευχαριστούμε πολύ!!!
 -
@dast We have to thank you for the awesome work you do!!! I was looking for Dials everywhere but i saw that it wasn't available from your website anymore and luckily i found it here!! I have installed the correct version in both installation folder and preferences folder, although it's not showing up in R25. I'll try some other way and i'll come back if i can't find any solution. Thank you again for the work you put on these plugins!!
-

Cinema 4D Incomplete loop cut
BridgeThoseEdges replied to TsuriH's topic in Modelling - Do Not Post Here
N-gon is a polygon with more than 4 edges-points. -
Cinema 4D Adding elements to a control panel
BridgeThoseEdges replied to Renji's topic in Modelling - Do Not Post Here
One more option for similar situations is the Transfer tool. I'm posting a screenshot (sorry for the poor quality), where you can find it and how it works (you simply select the object you want and with the tool active you click on the object you want to be transferred). In some cases you might want to uncheck the scale option, as it will change the size of your object to the one that's been transferred. IMPORTANT STEP: You need to follow the CERBERA'S axis workflow first, otherwise you 'll get wrong results. -
Cinema 4D Incomplete loop cut
BridgeThoseEdges replied to TsuriH's topic in Modelling - Do Not Post Here
Like the other guys already said, your topology has some n-gons, which make the loop cut stops as it doesn't find an opposite edge to continue the cut. I 'm posting a screenshot with a similar model to yours, but with different topology and as you can see the loop cut tool does the job pretty well. I've highlighted at the right side two option of the loop cut tool, if you uncheck them the loop cut won't stop at an n-gon or a pole (pole is when more than 4 edges meet at the same point, even 3 edges meeting at the same point can be considered as a pole). Keep that in mind though that it will cause problems in your topology if you uncheck those two options, and you 'll have to cleanup your mesh manually.