pilF
-
Posts
244 -
Joined
-
Last visited
-
Days Won
3
Content Type
Profiles
Blogs
Forums
Gallery
Pipeline Tools
3D Wiki
Plugin List
Store
Downloads
Everything posted by pilF
-
I recently asked for a quote for this setup: Antec NX800 ATX Case RGB 1 Coolermaster V850 Gold V2 Modulair 850W Gigabyte Z790 Gaming X AX LGA1700 DDR5 Intel Core i9-13900KF LGA-1700 1 Kingston Fury Beast DDR5 64GB (2x32) 480 Samsung 980 2TB M.2 NVMe 1 Samsung 8TB 870 QVO 2.5" 2 PNY RTX 4090 XLR8 Gaming Epic- X-RGB 24GB Noctua NH-D15 140mm CPU Fan 1 Total 6.400 euro including VAT, keep one old 2090 card as @keppn suggested for non render work
-
Very useful, looking forward to more insights.
-
This might contain some usefull information: https://mographplus.gumroad.com/l/sBOdv?layout=profile
-
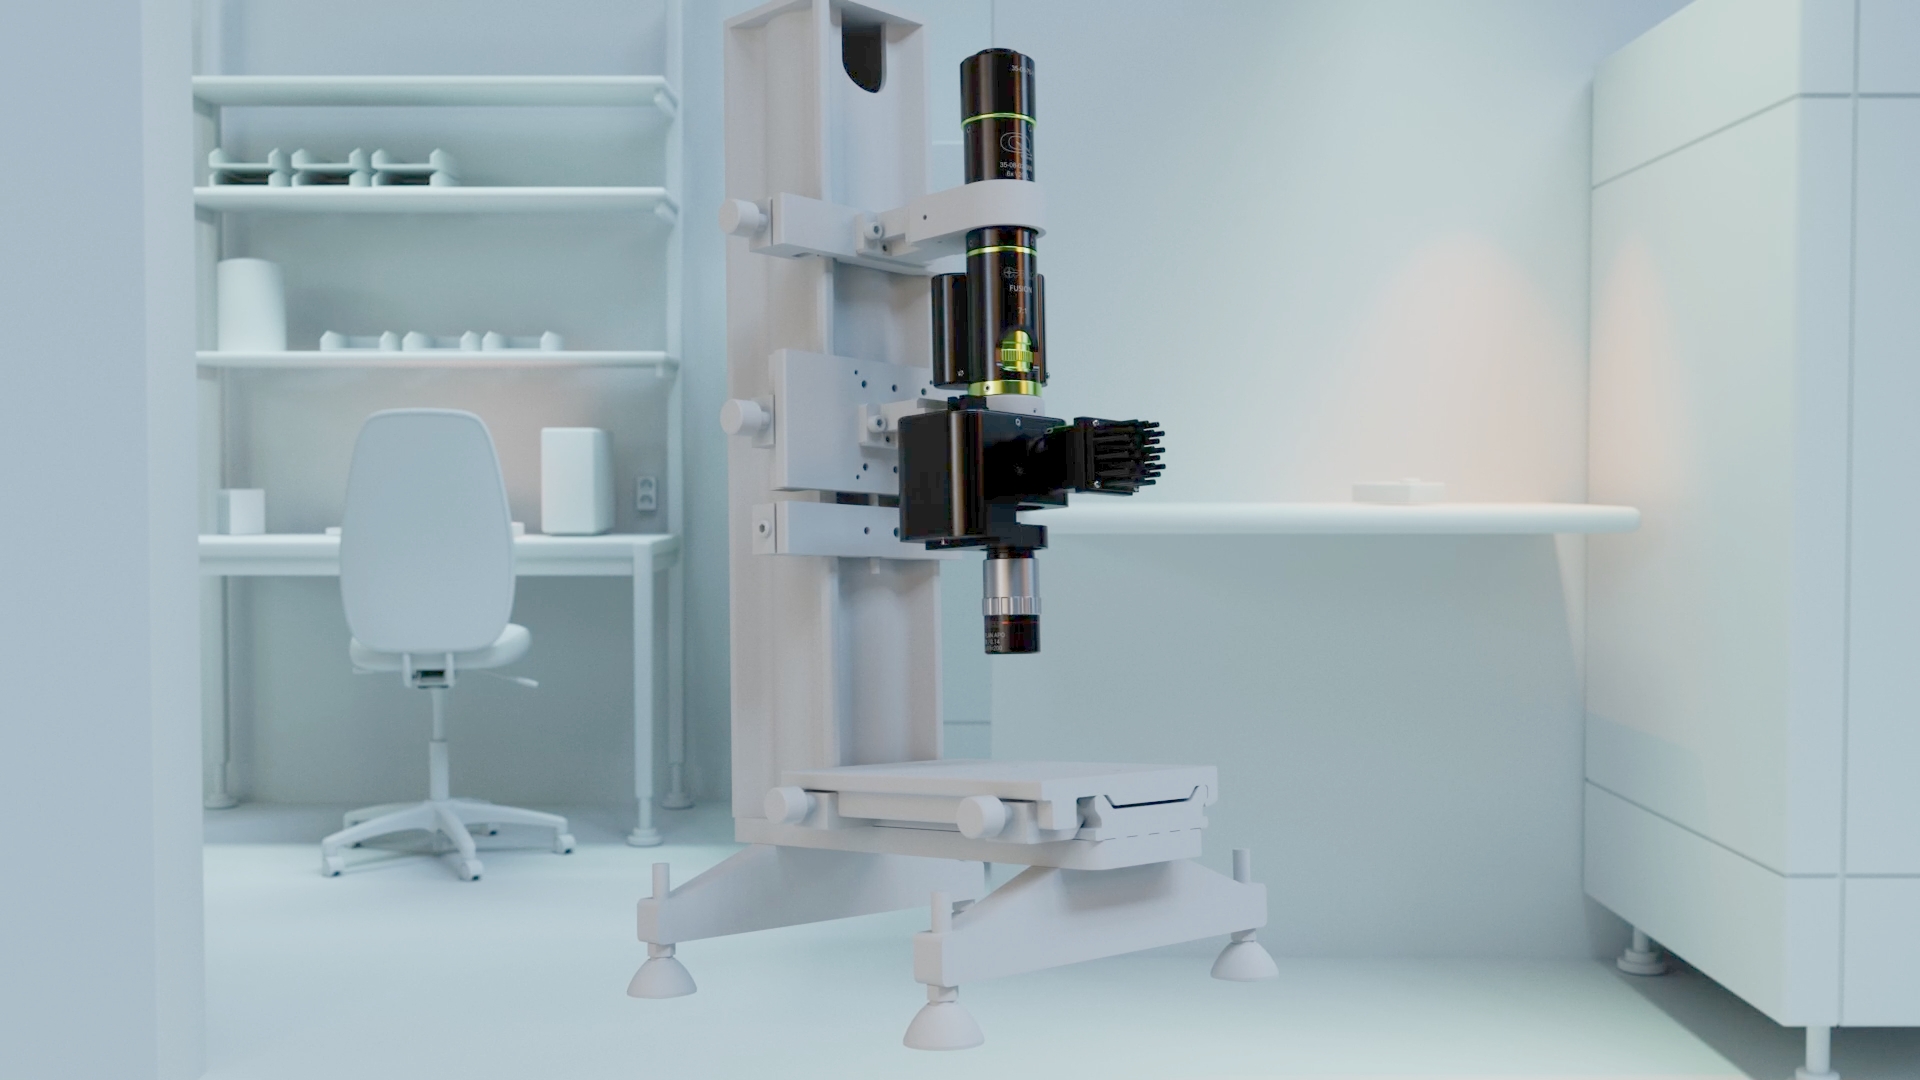
You are right @keppn it is a bit over the top. I could have made a model. But the client wanted to show the actual enviroment to the viewer. Also there were 8 different locations and only one afternoon to scan them all on saturday. Normally th ehospital would be too busy. The recording and preparation took about 2 days. It had to look a bit like this other animation i made about a shunt where the patient gest to see where they wil actually go and what will happen. https://www.flip.nl/portfolio/shunt/
-
I made the details in C4D visible through Xparticles. Each point representing one particle. Limiting the number of particles through selection sets made C4D navigation more responsive. The emitter is the pointcloud limited to the selectionset I choose. Emitting from points with zero speed. I often forgot to tick the option ‘one particle per source object’. This results a uneven distributed particles, you only see part of the scan. The number of particles was often somewhere around 100.000 for the whole scene. From here on i was able to place the camera with the markerboard roughly in the correct position. The size and distance of the cherckerboard was known relative to the lens focal point. After eyeballing the marker I had to fine tune the camera calibration by nudging it a few degrees or 1 or 2 cm. It was relatively quick compared to the normal calibration process and i had the correct position of all the objects in the room. Including the direct light sources in the ceiling and windows. I used a Ricoh theta Z1 panoramic camera to make a bracketed sperical hdr image for th eindirect lighting and reflection. This way the character and the backplate would match better. The backplate was calibrated with a xrite color checker photocard. Setting up xparticles http://www.dataflip.nl/core4d/lidar_13.jpg http://www.dataflip.nl/core4d/lidar_14.jpg Camera placing http://www.dataflip.nl/core4d/lidar_16.jpg Recreating the desk http://www.dataflip.nl/core4d/lidar_17.jpg http://www.dataflip.nl/core4d/lidar_18.jpg http://www.dataflip.nl/core4d/lidar_19.jpg
-
In C4D the pointcloud needs to be properly orientated (scale set to 1m) and centered. I divided the cloud into selection sets to make it more manageable later on when it would be made visible with xparticles. The object scanned is a research room in a hospital. Originaly there would be a conversation between two people at the desk. To avoid too boring footage of talking heads i wanted to switch perspective during the dialogue. This meant careful planning of the camera shots in the storyboard and the camera position and the lens used. The cg characters were made to scale but in the end i had to cheat their position at the desk in order to make the shots work. Sitting below their virtual seat or hovering above it. So much for careful planning. http://www.dataflip.nl/core4d/lidar_11.jpg http://www.dataflip.nl/core4d/lidar_12.jpg
-
I exported it as an obj dense point cloud file which can be read into C4D. http://www.dataflip.nl/core4d/lidar_08.jpg
-
Notice the scanned camera's with the marker on top. http://www.dataflip.nl/core4d/lidar_05.jpg
-
After some processing switching on the dense cloud option showed the lidar scan of the e57 file. Posted more images on my dataserver The resulting pointcloud http://www.dataflip.nl/core4d/lidar_04.jpg
-
After some testing it was clear I could not work with the native oc3 format. But I found the e57 format does work. The e57 format saves out the vertex colormaps too. This can be read into Agisoft Metashape photogrammetry software. And yes I have mixed thoughts about that. Agisoft Metashape is a Russian made application I bought a few years before the 2022 invasion. That said, Agisoft offered me a free trial of the pro version for four (sic!) months so I could try and combine photogrammetry with the scans. That way I could use each photographed backplate perspective in combination with the scan resulting in a virtual set. I did not succeed in combining the two.
-
First of the point clouds were merged by the operator. Every time I moved my backplate camera he made another scan to record its position. My camera had a huge checkerboard marker on top. And to prevent shadows in the laser samples the operator changed the scanner position too. The scanner can only sample what is visible. The resulting pointcloud was merged with the Trimble software. Previewing on the pad screen was remarkable responsive. You can also buy a decent second hand car for the price of that scanner.
-
Thank you @Igor and @keppnI think it is best to make a short video as i seem to be limited to 4 images in this post. As some chararcter said : I'll be back
-
For a recent project I had to integrate a photographic environment with 3d characters. Having spent ages in previous projects getting the perspective right with camera calibration I decided to try using lidar scans (a Trimble X7 Laserscanner with sampling set to 1 cm and a very friendly operator named Paul from paul3d.nl). With the correct lens settings for my camera I found this to be much faster, compensating for the extra cost tinkering with the setting. If anyone is interested I'll post a more detailed report of my journey. Philip .
-
PSD morphs are fiddely i found, at least in R 26 they were. Lots of problems with mirroring and getting the mirror offeset. The mesh was not dead centre at the origin. Askes questions at the cineversity forum got replies: https://www.dropbox.com/s/l5gq5da884qhkti/Mirror_PSD.mp4?dl=0 I think this thread about PSd files cancelling each other might help too: https://www.cineversity.com/forums/viewthread/5535/ Philip
-
I'd totally forgotten about this bit:
-
I'd say Independence day where the aliens switch on their racklet beam and toast the city, but that was a blue beam wan't it? It's not moonfall. Philip
-
Architron 2023 for Cinema 4D R21-2023 A brief overview of the next version of the Architron plugin for Cinema 4D.
-
Very useful, great find.
-
On cineversity can erduman sums up the pros and cons of the two systems in part two. For me the rig means more flexibility. Improving the mesh after the rigging. Posemorph does not allow vertex adding or removing. For instance adding that extra loop. The pose library in the rig is very usefull. Just type facerig in cineversity. I had a hard time combining the face rig with the bodyrig though. And a lot of help from @bentraje.
-
Dear Core4D my best wishes for this new year. Was wondering if there is anyone who has played with cascadeur and C4D yet. Looks usefull judging by the promo's i see though these are mainly martial art stanzes and the inevetible dino. FBX would be the main in and export i guess. https://cascadeur.com/ Philip
-
Updated the RS install, problems begone
-
That's an impressive build, I have two 2080 Ti cards that fit barely. I guess replacing one with a 4080 would never fit . Not to mention temperatures going up when full throttle. So, what are the specs of the components in your machine. Asking for a friend ... Philip
-
Thank you for your time, I'll send one. I'm mid project R26.107 and reluctant to upgrade. Any known pitfalls for 2023 compared to my version?
-
I've attached an eyeball, thank you for looking into this. Philip eyeball.zip
-
Yes, I'm hoping to be missing something very obvious
