Leaderboard


Popular Content
Showing content with the highest reputation on 09/09/2021 in all areas
-
Hi all, I came across Clarisse last year spending a weekend watching as many presentations as I could. It's something I'm very keen to get into my workflow particularly for large scenes. There are some old posts in this forum but no details really. They sell a perpetual Indie version for very reasonable price so I bought it. They do have a learning version but with all the tools going subscription I kind of panic bought it before they ever decide to switch. The developers and owners are very accessible with daily interactions through the web forum and unofficial discord channel. Very helpful community like here too. The last year or so I've been learning Redshift, Octane, Houdini, Clarisse, AE and will be spending few months with PS and AI next. It's not to be an expert in any of these but I want a familiarity with them in order to produce the content I intend to. Trying to fit this in with a full-time IT job is a bit tricky at times, but nothings comes easy if want it enough I guess. Anyway ramble over, I saw Andrey Lebrov post a good brief overview of it along with a discount code (valid for 90 days) if anyone is interested. I've been chipping away at some Wingfox tutorials for it which have been great. Some of it is dated and subtitles not make much sense at times, but it's the actions on screen to follow. Render is currently CPU thread count based with a viewport of CPU/GPU. GPU render "Angie" will be release at some stage hopefully this year.2 points
-
Thank you very much for your time !! I think we will meet again through other topic 😂 I have the impression that I will need help more often than expected, for the moment this software seems so complex to me!2 points
-
So I’m working on getting the little ship to break the wall. Trying to make it a bit more realistic. See if I add the video correctly. 🤞 sorry, haven’t figured out how to embed properly, lol https://youtu.be/1xwrg6wGRCI1 point
-
Thanks for sharing. I purchased a perpetual license of Redshift before it went subscription to use with my R20. Still need to buy me a new computer with GPU to use it. Knowing what I know now it seems I better had spend the money on Clarisse instead. I had heard about Clarisse some years ago, but never paid much attention as it still was a lot of money ... next to the yearly MSA. Now that I have settled with R20, I am more tempted to invest in this Clarisse. And with the current discount code, that might just be the final push to take the plunge (... figure of speech).1 point
-
When people ask me what my hobby is, I reply: "Learning new stuff" : ) There's so much good stuff to explore. I was aware of Clarrise but not much more. It does look amazing especially for larger scale and environmental type work.1 point
-
Yesss thank you for the advice I didn't know this shortcut1 point
-
Yeah I am sort of thinking that myself - after all it is no great hassle to delete (without children) the null, and I can see how it would be helpful... But I also checked the help for Make Editable which makes no mention of it, so will perhaps suggest that as an improvement they could make to decrease new user (and old beta tester !) confusion !! And HOW I had never noticed this before using it as much as I do was intriguing ! But on reflection, I CAN see why I haven't seen this before - whenever I add a parent SDS I do it using the alt modifier so that is is created exactly where the child is. And I guess that would be the advice to give Leadlrr if she would like to avoid this going forward ! 🙂 CBR1 point
-
Yep, can reproduce this in R23 as well. If the SDS and child-object do not have the same coordinates it results into a null Same in R21 and R20 Wait a minute ... this seems to be intentional, as it happens in R19 as well. So many versions, can't be unintentional. I think they decided to put the cube into a null, since the origin of the SDS is different from the origin of the child object. Which makes sense to keep the child object with its origin, and provide the origin of the SDS as a parenting null. When you both move the child object and the parent SDS with the same amount, both origins are identical, and then no null is created.1 point
-
Not saying this can be helpful in this case, but it is also important to know where the mouse cursor is hovering over when you press a key. It took me years before figuring out that when selecting polygons and pressing the delete key that the whole object got removed from the scene, instead of the selected polygons. Reason was that -inadvertently- my mouse cursor was hovering over the Object Manager when I pressed DEL, and this seems to indicate Cinema4D that your intention is to delete the currently selected object in the Object Manager. Keeping the mouse over the 3D viewport when pressing the DEL key does what was supposed to. So, be aware where you're pointing at when doing things 😉1 point
-
Welcome to the Core 🙂 You do indeed make things editable by selecting them in the Object Manager and pressing C, or the make editable button in the interface. However, when something this simple fails you need to make video of it failing for you for us to be able to know what is going wrong here. Without that we can't know what you may be doing wrong to cause this... CBR1 point
-
Looks like the latest from melodysheep is shaping up to be a very good one 🙂 CBR1 point
-
I think your test is very close to realistic. My only issue with maybe the gravity or mass of the particles. The chunks appear to made of lighter material than concrete. Aside from that, it looks great.1 point
-
Thanks! Yeah it’s fun seeing things come together after long nights of work. and I’m super into 3D printing and bringing projects into the real world. So fun to bounce in and out of reality.1 point
-

From the album: Art of Title
1 point -

From the album: Art of Title
1 point -

From the album: Art of Title
1 point -
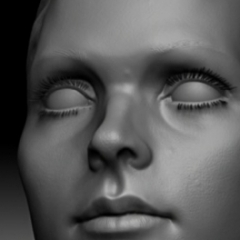
Hi Im sure others can fill in the gaps so here it goes. 1: Model base pose: You need to not use extreme poses for models you intend to rig. The previz character can have nice S curves in the pose but save that for previz. The actual model needs arms to the sides, fingers slightly apart, hands pronated, legs slightly apart, arms and legs slightly bent to aid IK natural bend. I like to model eyes half closed as its easier for weighting. 2: Prep and check the model: For the rigging stage to commence I will make sure there are no floating points, the model is 100% accurate and symmetrical for easier weighting (dependant on model) and that its scaled correctly, facing the correct way and centred in world space on the floor. I would also put the pivot at the feet. Zero out the Cords, and check the Uvs are perfect. 3: Name conventions Its good to name all joints and make sure you stick to a name convention. You also need to keep consistent prefix or post how you define left from right joints. R_Shoulder, L_Shoulder for example. This will aid in correct mirroring later on. 4: Joint placement: You got to be careful not to follow the placement of joints to match real human anatomy. The spine is located toward to back on a real human but it should be centred of the torso so as to not deform badly in either extreme. Shoulders can be a pain but with proper placement its half the battle over, always inline with the armpit I found to work well. Joints slightly toward the knee, and elbow aids the Ik, more so if your limbs are straight. I also zero out cords as I go, more so the Controllers to enable (Reset PSR) for base the pose later. 5: Auto weighting Vs Manual Auto weighting could well take you way longer to get good results by tweaking weights than to flood a designated area or limb, then blend it. Auto weighting is fine for starters but the best results come from flood weighting and smooth blending. 6: PSR corrections to hide bad weighting. Its tempting to fix weighting issues with PSR morphs, or commonly known as (Join Controlled Morphs), don't do this. Make the weighting do most of the work, then clean it up with corrections after. 7: Check the rig is working as you go. Don't assume all is fine, you could have some dependency issues which need sorting. Its easier to find and fix a fault as you go than discover it days into a complex chain of events that is hard to unpack. 8: Add your own controllers for Ik, I like to add my own controllers and use them for the Ik. Your get better positioning for them and they look better. If they are spline based you can get more control over the shape, and move the pivot if needed, you cant with Nulls. Thats enough for now, I let others add some. Dan1 point